Creative Landscapes
To begin my study of Creative Landscapes I will study a photographer. This helps outline a style of creative landscapes focusing on their techniques of creating an outcome. This will help me achieve a higher standard of work and a greater outcome by understanding the artists work. I chose creative landscapes because of the freedom the project presents and how we are effected by our landscapes everyday. Landscapes can effect our mood, health, and how live our lives.
Liam Wylie
|
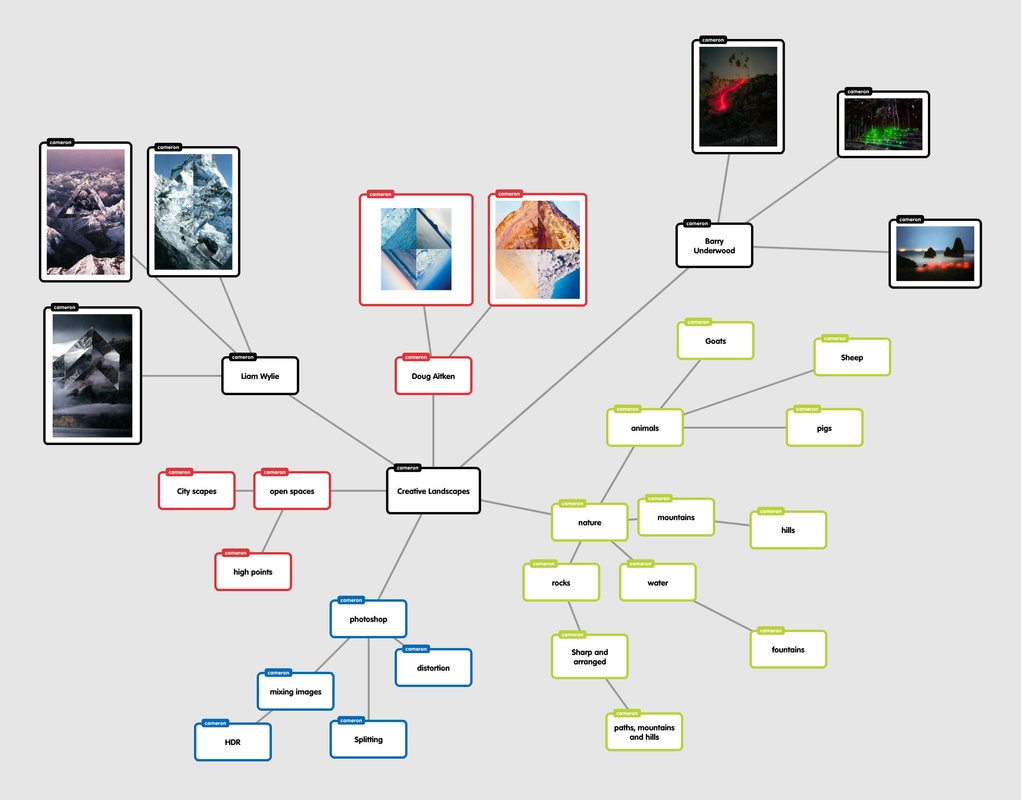
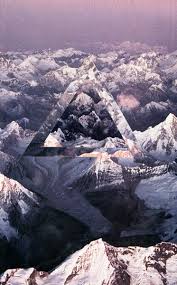
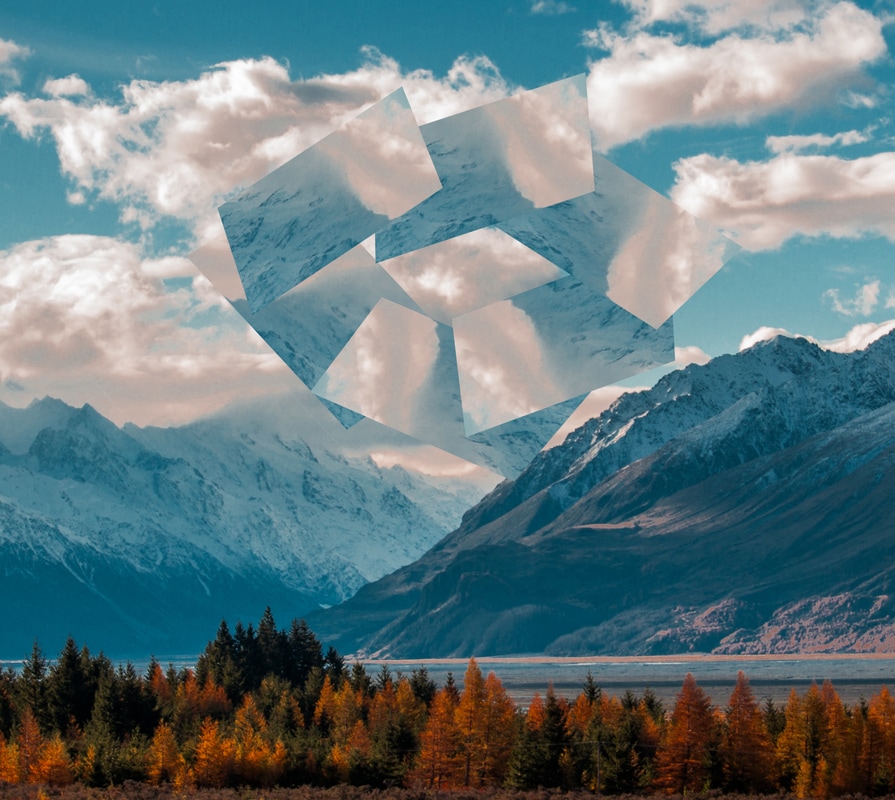
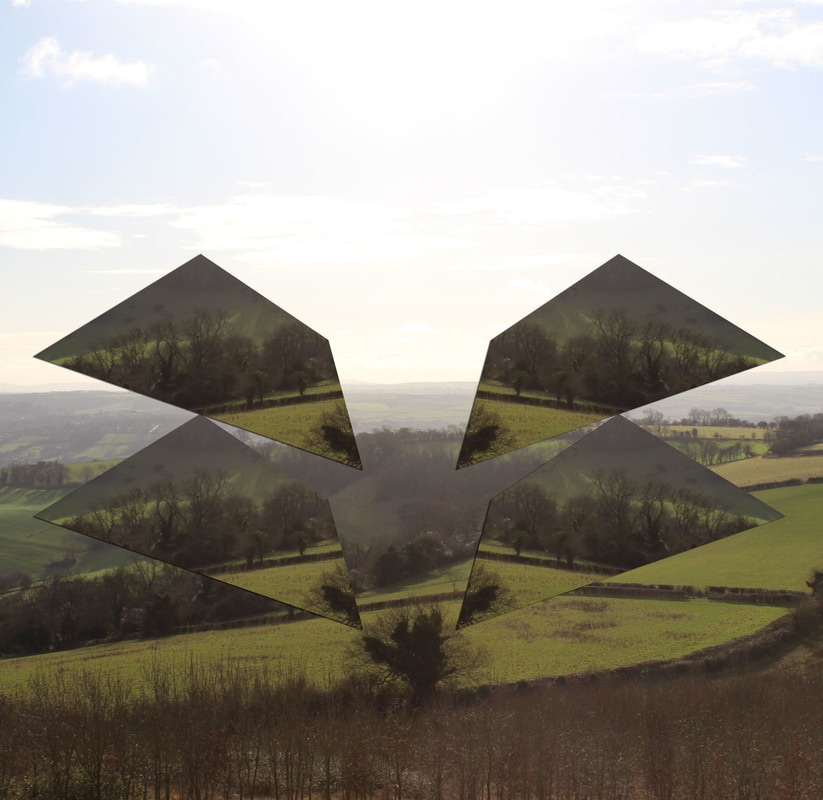
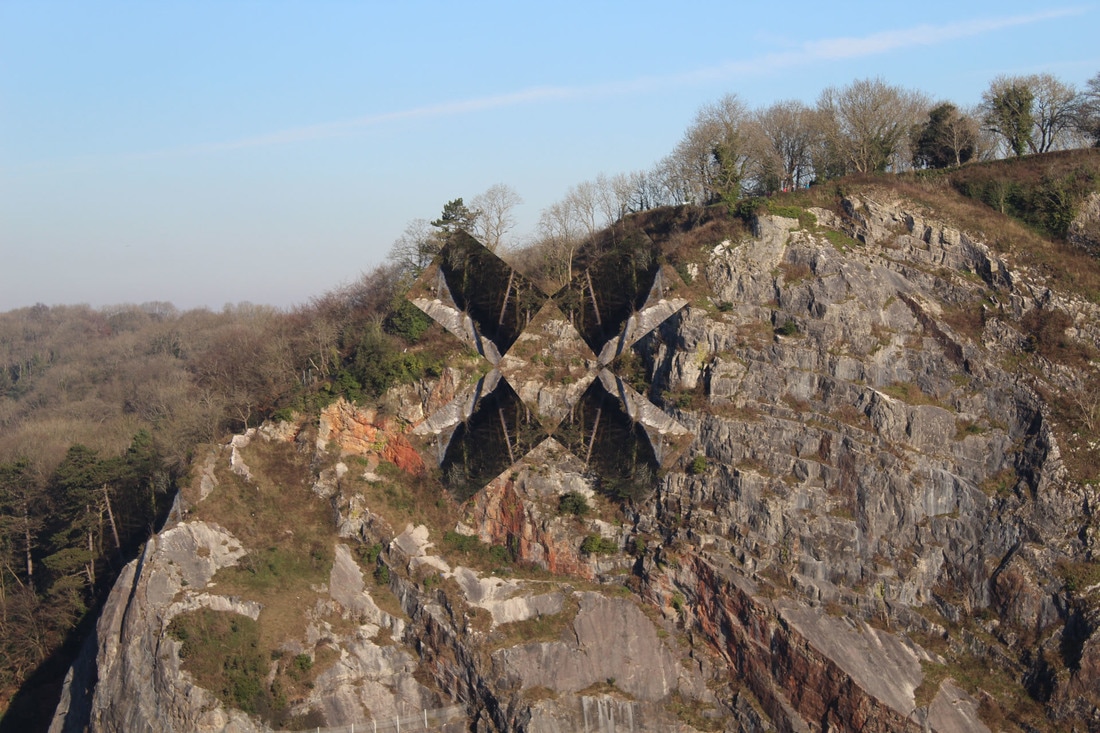
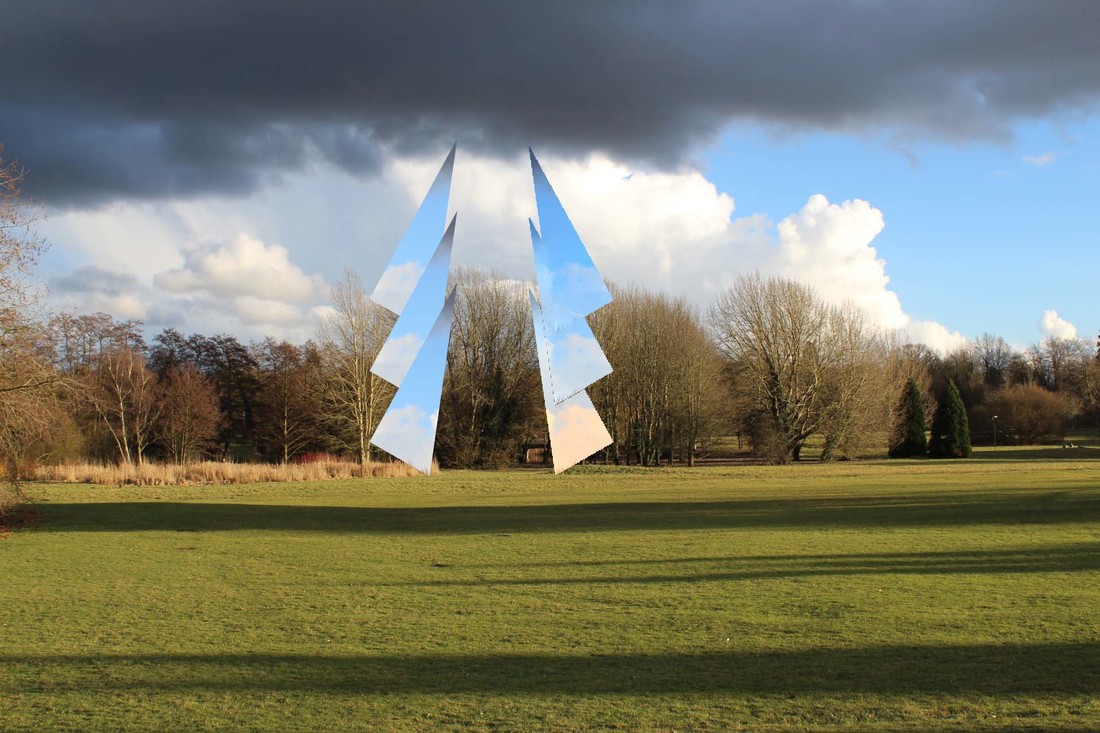
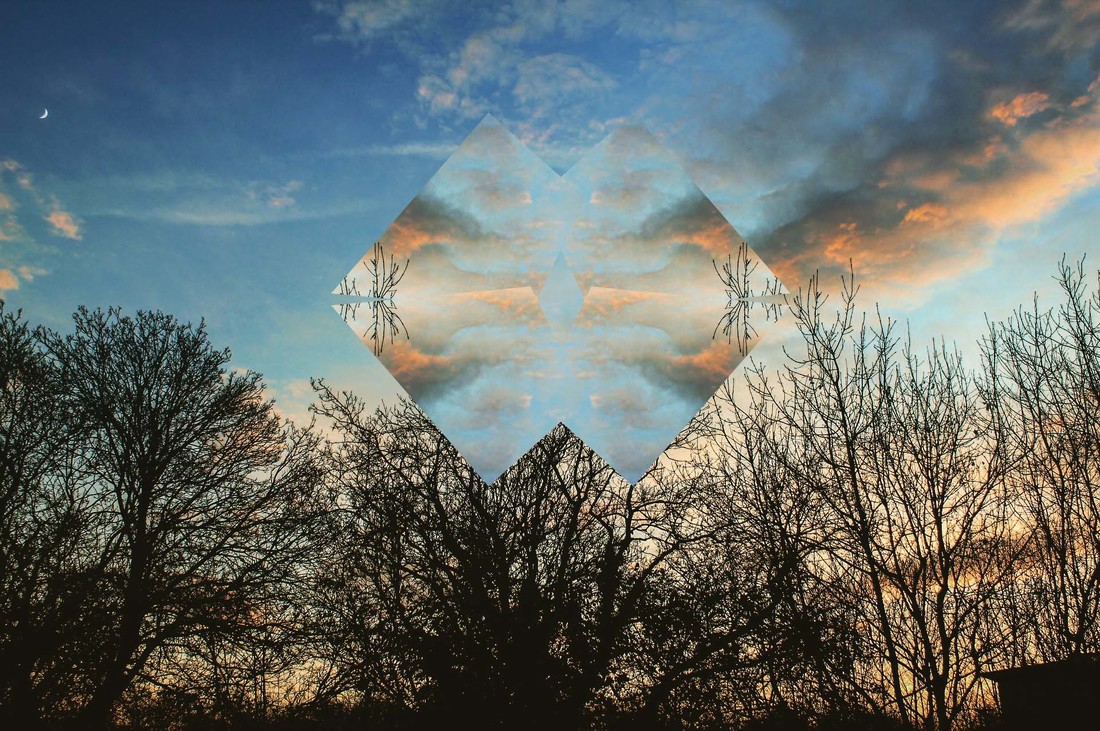
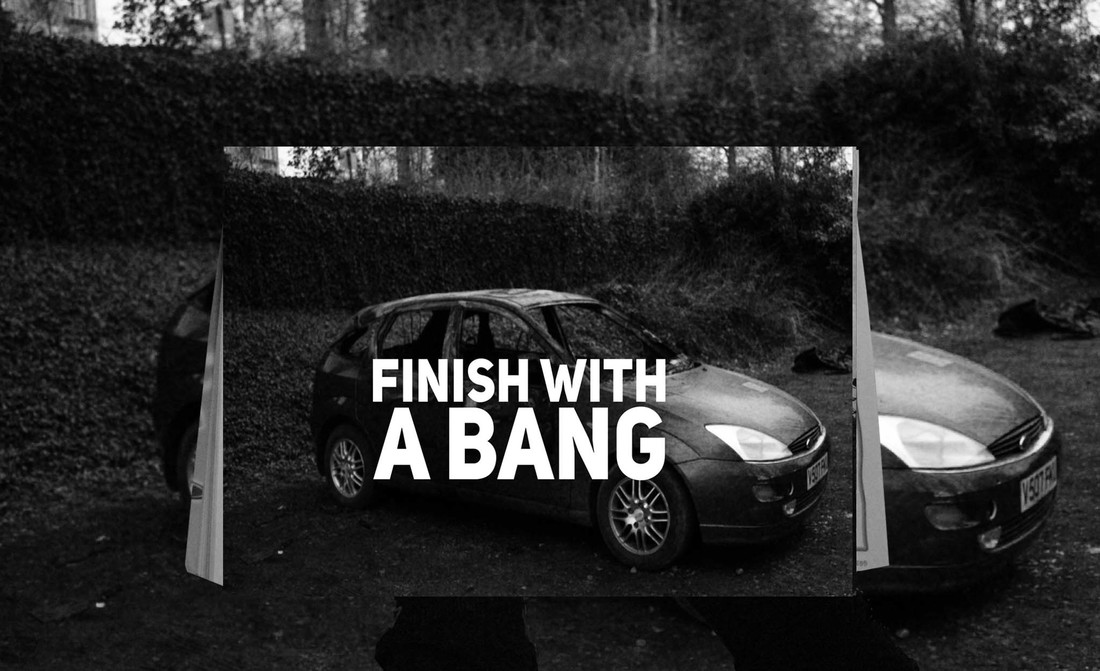
This Photo is of Louis Reith, a mountain Liam Wylie describes as perfect because of its sharp icy white tips that are a "graphic delight."
The photo is taken from sea level and takes on a very potrait shape. It fits in clouds and a dark sky in the background. An arrow made from four pieces fit in the centre of the image. The pieces to the geometry are made by cut up pieces of the same image. Its said that Liam Wylie most likely chose mountains because of his canadian life style. Canada has a very arctic style enviroment in some places. Giving Liam wylie freedom of this hospitable landscape so he can create interesting photos in a geometric style. Liam Wylie studied at OCAD university, he studied drawing landscapes at the life drawing and painting. I will attempt to mimmick Liam Wylies work by using the image to create rigid shapes just like the ones Liam Wylie uses. I will use use different shapes to make the bigger shape just like wylie. |
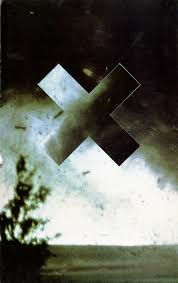
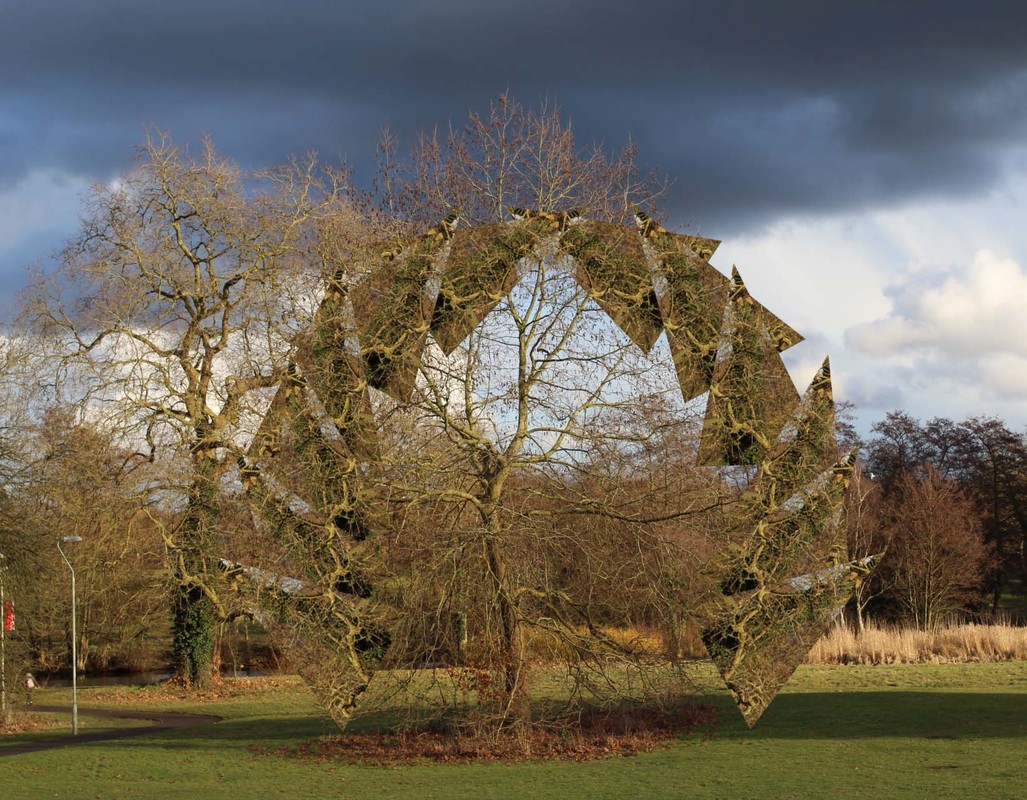
Liam wylie Examples
Plan For Shoot 1 and Testing
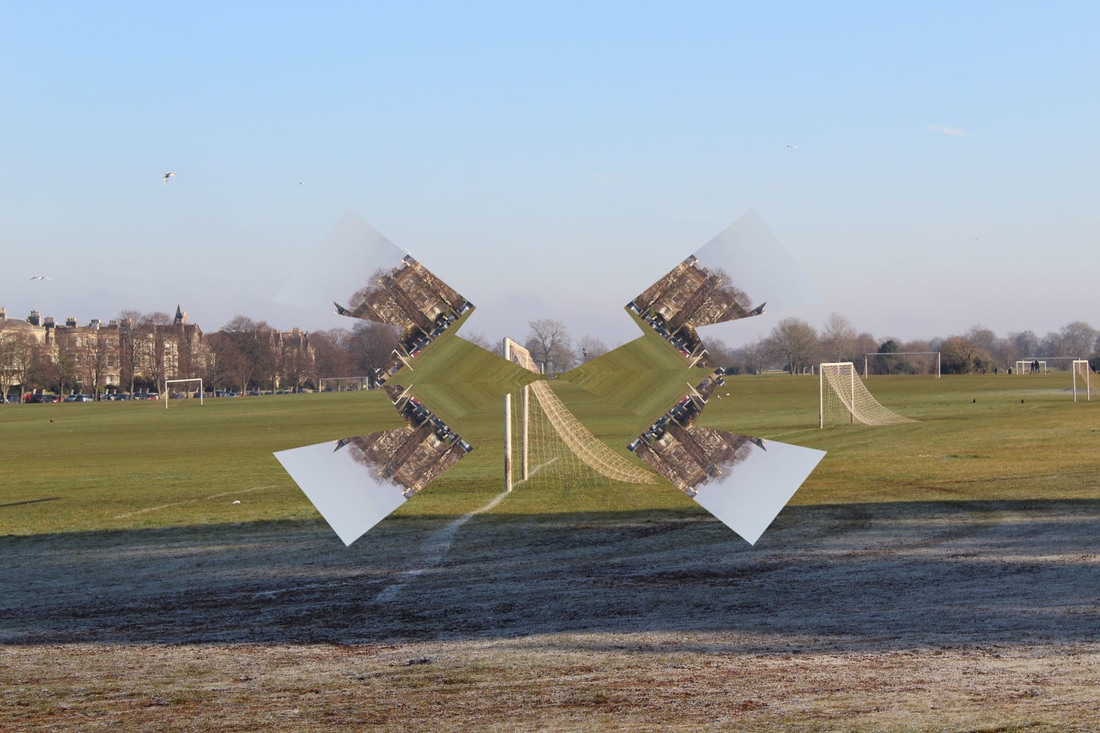
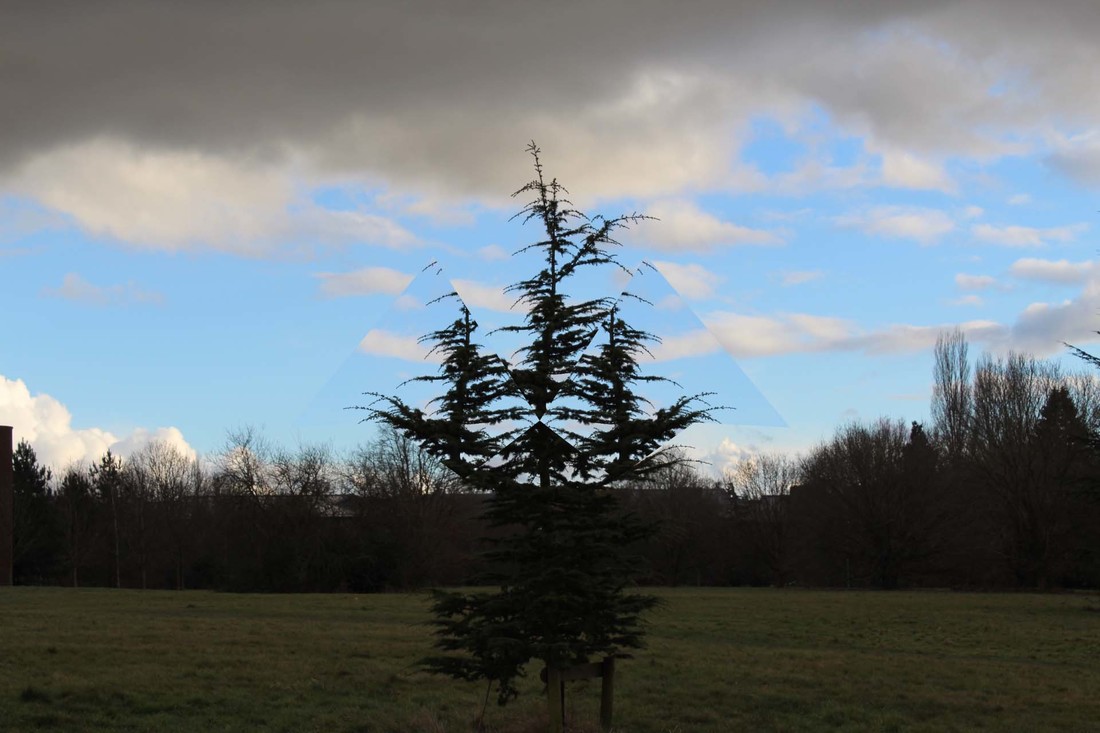
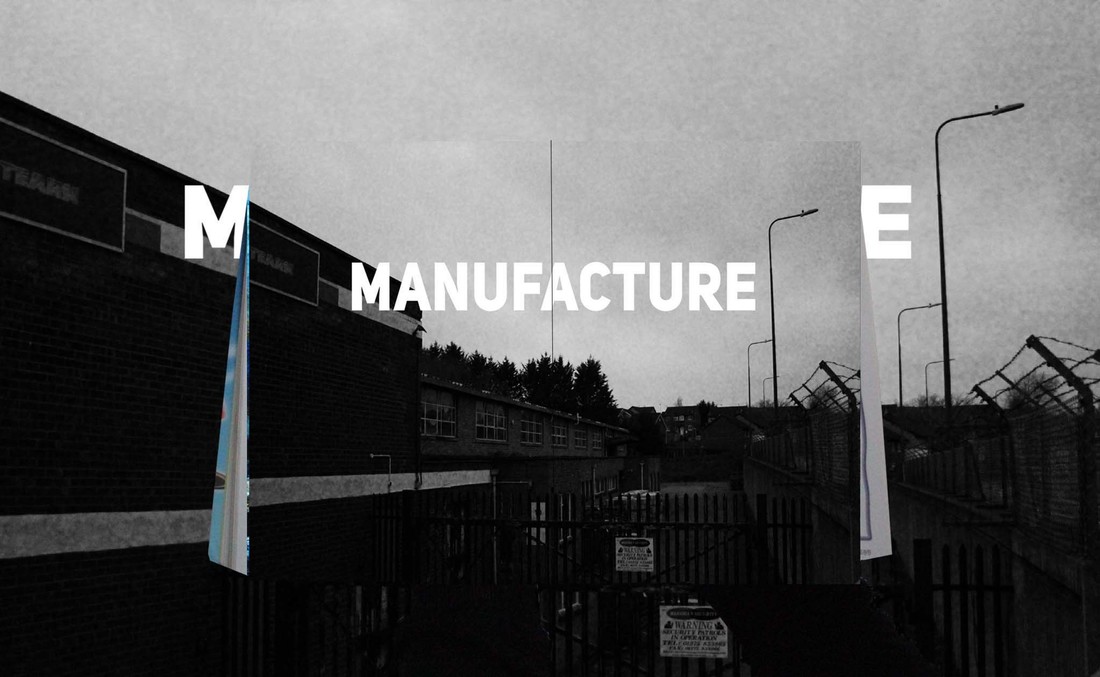
For tomorrows photo shoot I will conduct photos in wide spaces like the astro turf and willow tree in front of the school. By using a wide space I can incorporate more play with geometry. I will experiment with jagged shapes like triangles and squares using theyre rigid shape to munipulate the image in an attempt to mimmick Liam Wylie's work. I will incorporate nature as much as possible however school can be more urban so I will manipulate images of buildings aswell.
Shoot Evaluation
Due to rainy conditions I was restricted to work inside. So I "borrowed" some images of the internet, I played around with the magnetic lasso tool and move shapes around. I created these images.
Shoot 2
www: I think I used interesting and bold geometry to give an interesting look to the image.
Ebi: I think an increase in quantity is needed because I like these images however there is not a lot of them, also I'm not sure about the colours.
Ebi: I think an increase in quantity is needed because I like these images however there is not a lot of them, also I'm not sure about the colours.
Clifton Edit
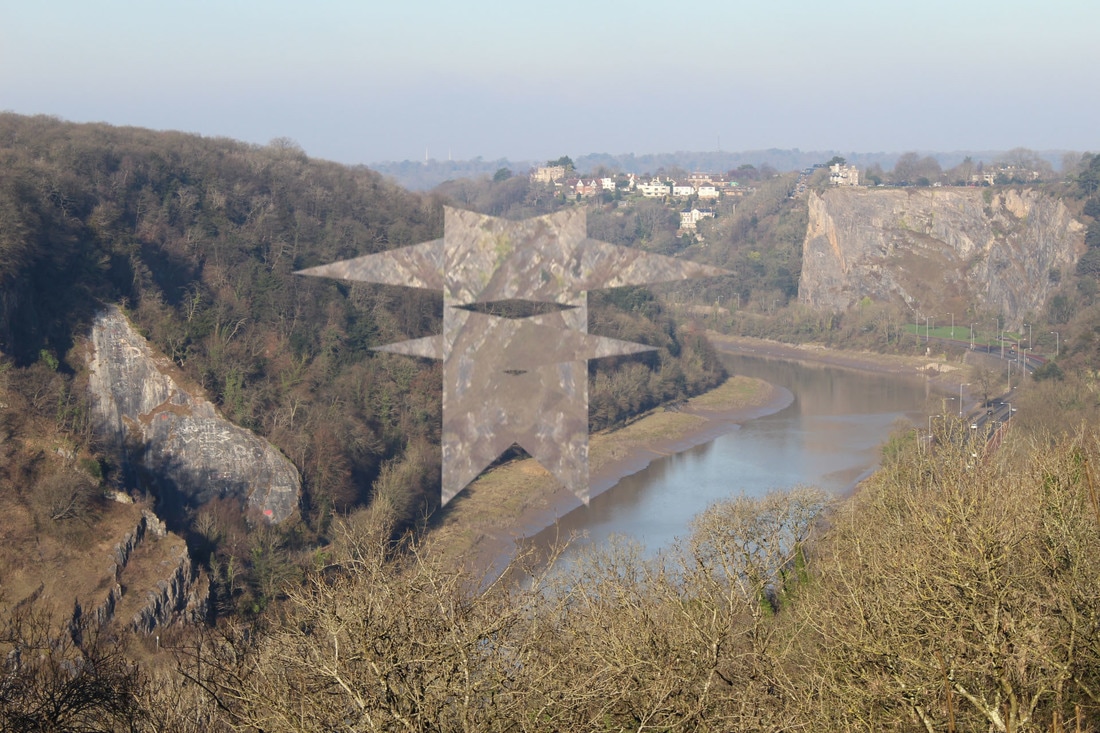
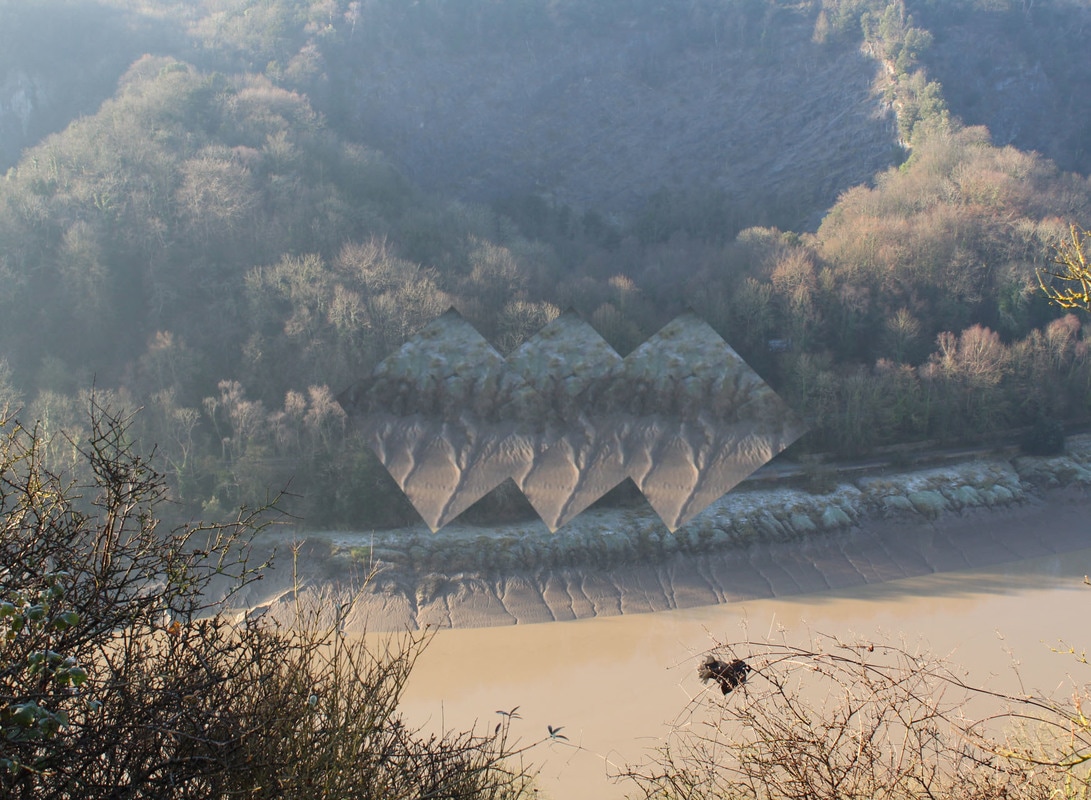
On Saturday I took a trip to Clifton, I used my 1300d DSLR camera and took these photos. I aimed to get a different colour scheme to deep greens and browns like the one in the previous shoot. Also I tried to incorporate the rocky landscape of the gorge because my critical analysis of Liam Wylie's work is on his photo of Louis Reith. Louis Reith is very rocky so I think it would contrast well.
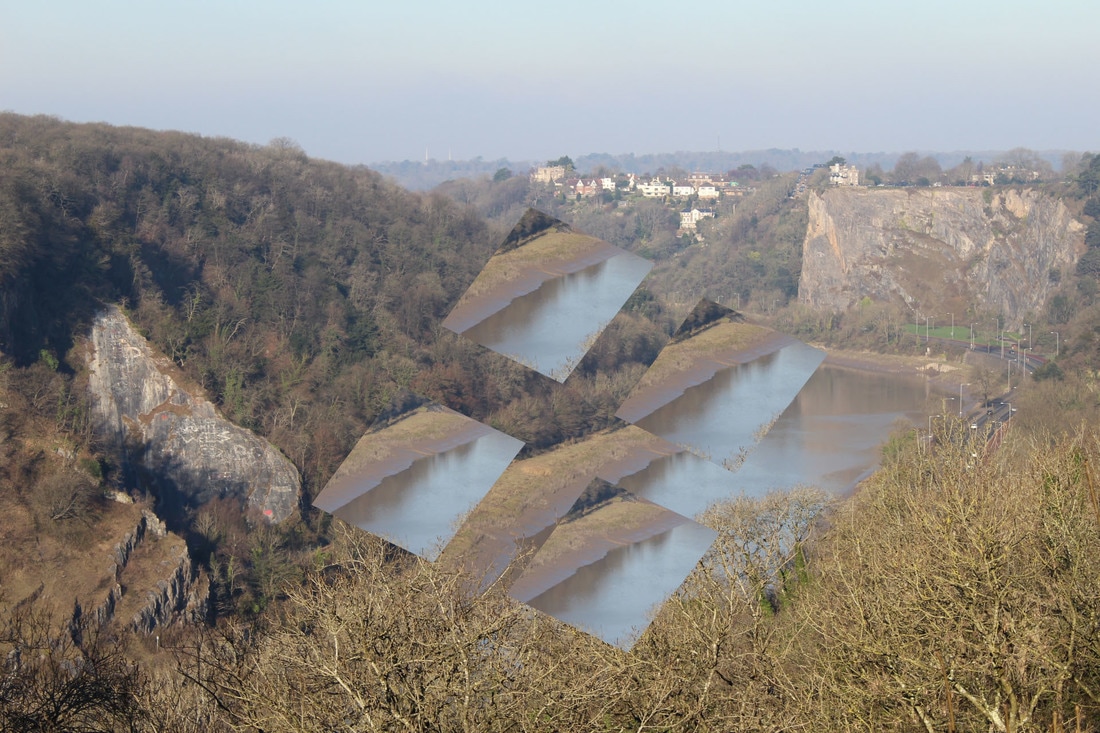
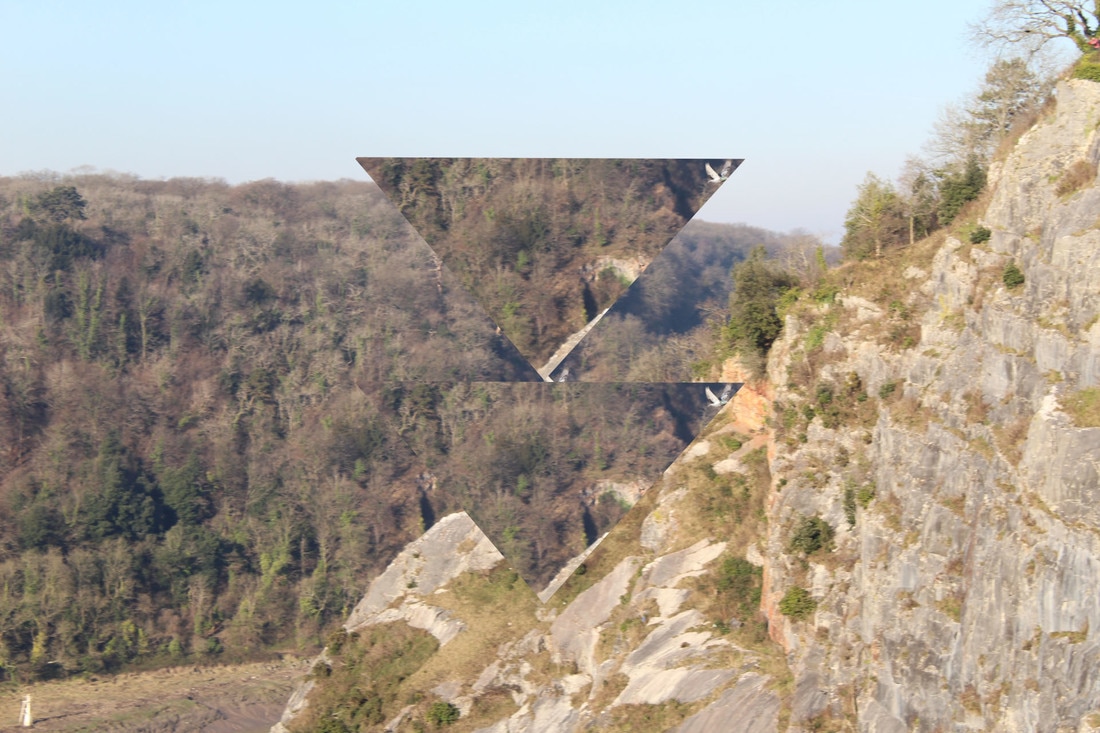
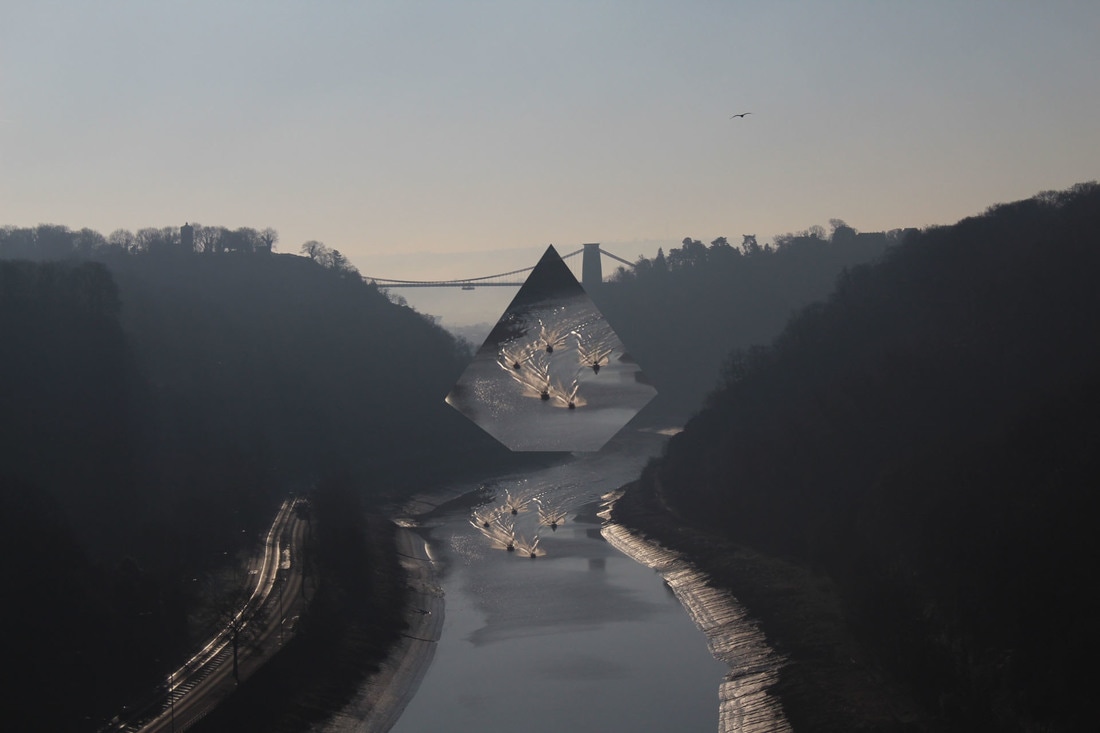
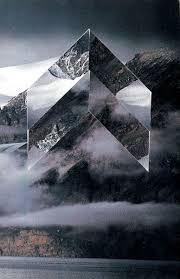
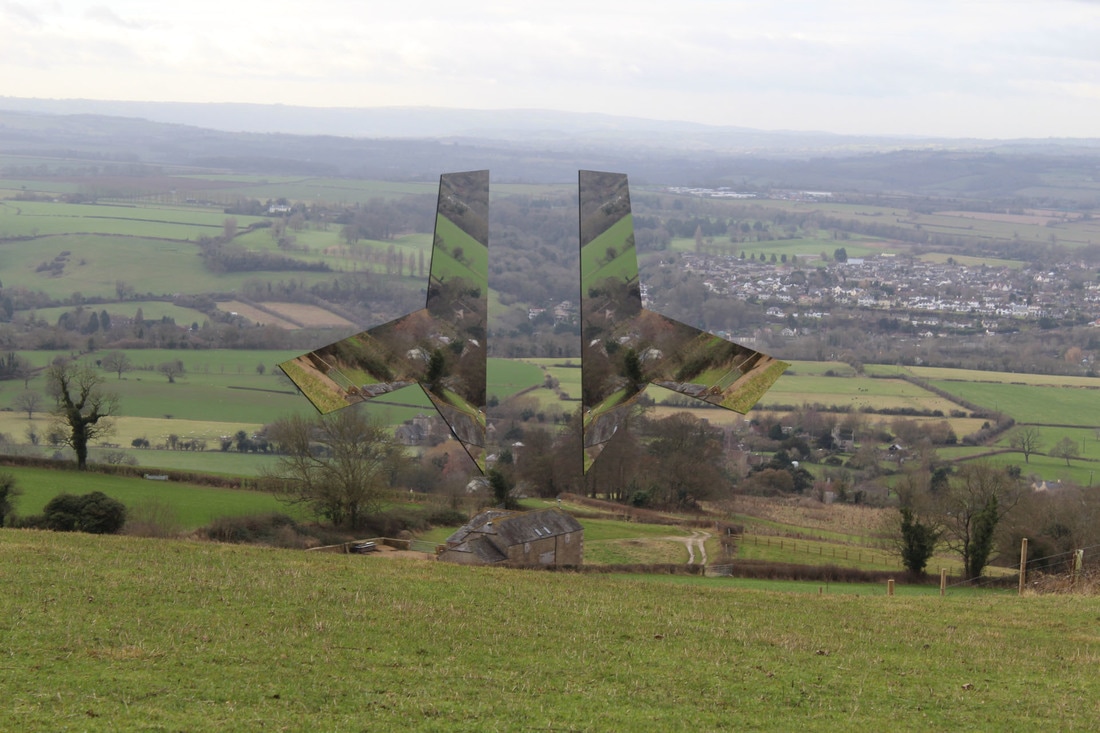
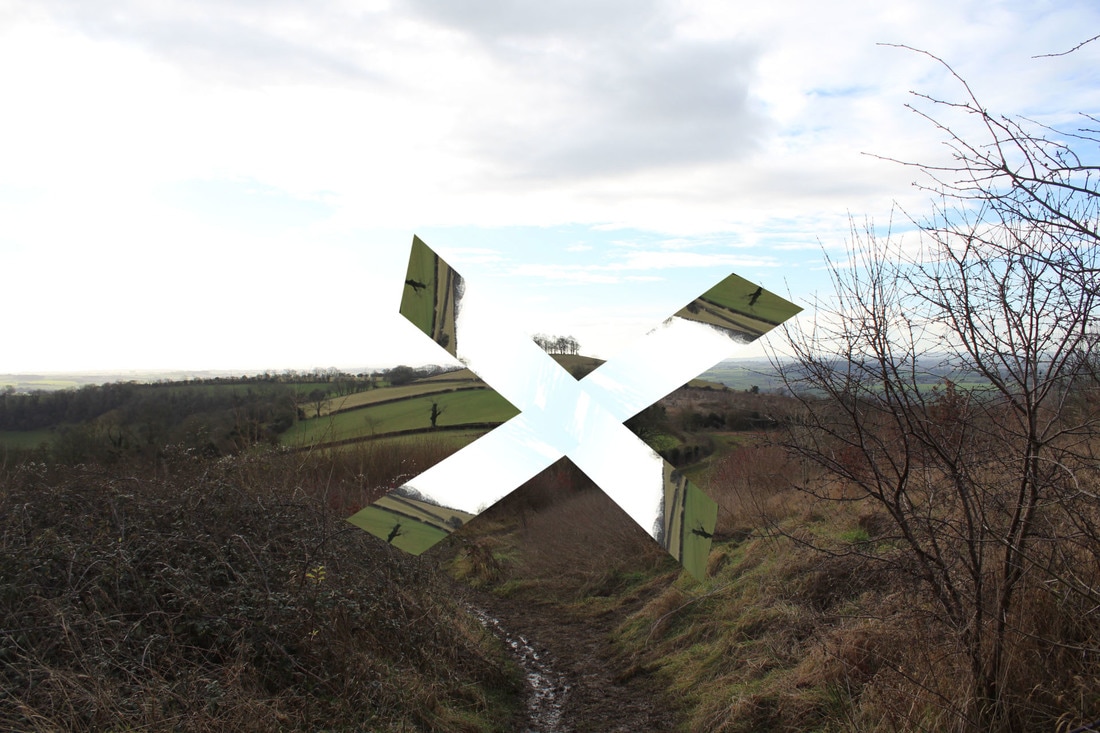
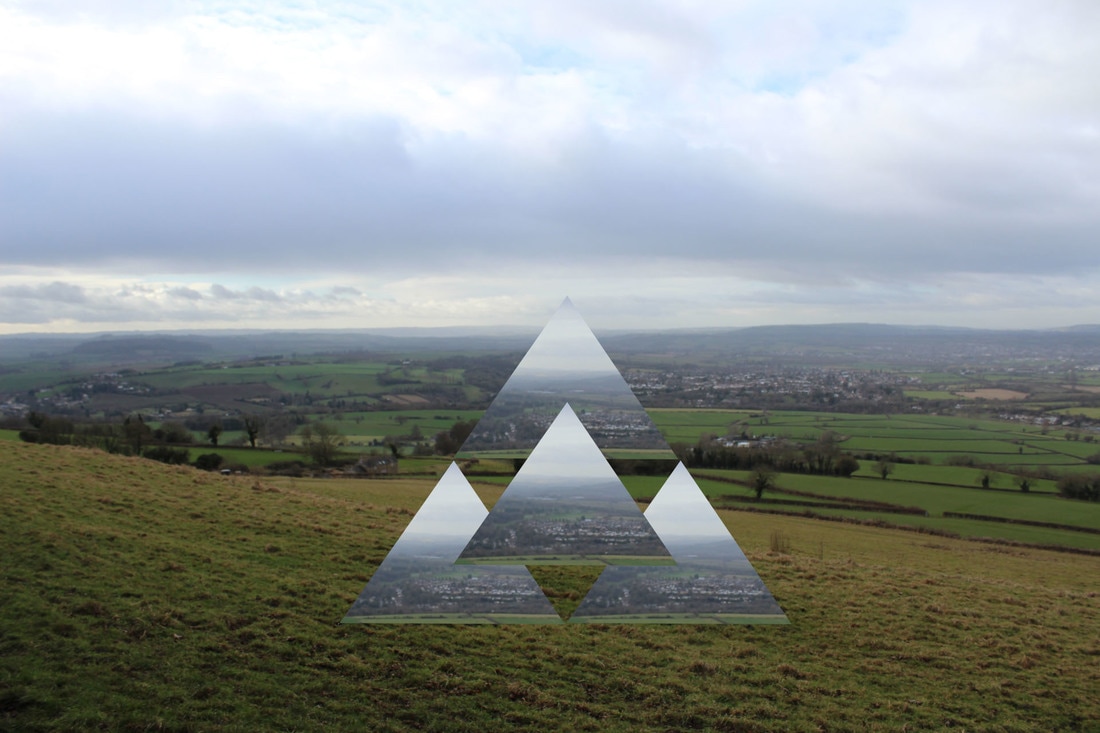
Peer Critique : Good examples of creative landscapes, the work has been clearly not been based on a photographer as you have not included enough of his work to link your overall ideas. Yes you have included one example of Louis work, which is a good start but you need to include more research. Plus your photographs appear to almost be similar to the chosen photographers, this can reflect badly on your overall grade as it could almost be unoriginal. You also use mostly the same shape in most of the photographs try use some unusual shapes instead of just a square / triangle.
Focus: Some of your photographs appear to be in focus which is good for a first photo shoot, maybe try refining new ideas with focus and other photo techniques as a whole in your next shoot. Try and be more 'focused in your work.
Technical Improvements: As I said previously, about focus, your photographs appear to be out of focus in certain photoshoots e.g. One of your first photoshoots at a field, some examples appear to be out of focus. I can see that you have used Photoshop to create your images. Try using different techniques in Photoshop to overall create a better, more slick look. I also recommend you focus on your composition for your next shoot. I don't like the way you have positioned the natural surroundings in your photographs as they seem weirdly placed.
Successful?: Try linking more too the photographer (post more pictures of the photographers work). Also use better focus and composition in your work. Overall your photographs are decent but could be a lot better. Focus on different locations. Dont just focus on natural surroundings as it makes your work repetitive. Explore cities, busy places as a whole.
-Owen Piercy
Self Critique
I think the good elements of my work is the pictures are clear. Making sure the image is crisp is essential. Also I think the chopping and changing of shapes are creative and stick to the artists work. The thing I enjoy the most about my photos is the colors in my second shoot. Furthermore I think the open locations are suitable.
To improve I think I should focus on the positioning of the camera so I have a really enjoyable location to work with in my images. Also I should work with shapes that fit more with Wylie's work. Wylie stays to a very certain set of shapes like crosses and rectangular shapes however I don't want to seem unoriginal.
To improve I think I should focus on the positioning of the camera so I have a really enjoyable location to work with in my images. Also I should work with shapes that fit more with Wylie's work. Wylie stays to a very certain set of shapes like crosses and rectangular shapes however I don't want to seem unoriginal.
refined critical analysis
|
Previous version of critical analysis:
This Photo is of Louis Reith, a mountain Liam Wylie describes as perfect because of its sharp icy white tips that are a "graphic delight." The photo is taken from sea level and takes on a very potrait shape. It fits in clouds and a dark sky in the background. An arrow made from four pieces fit in the centre of the image. The pieces to the geometry are made by cut up pieces of the same image. Its said that Liam Wylie most likely chose mountains because of his canadian life style. Canada has a very arctic style enviroment in some places. Giving Liam wylie freedom of this hospitable landscape so he can create interesting photos in a geometric style. Liam Wylie studied at OCAD university, he studied drawing landscapes at the life drawing and painting. I will attempt to mimmick Liam Wylies work by using the image to create rigid shapes just like the ones Liam Wylie uses. I will use use different shapes to make the bigger shape just like wylie. |
New version:
This Photo is of Louis Reith, a mountain Liam Wylie describes as perfect because of its sharp icy white tips that are a "graphic delight." The photo is taken from sea level and takes on a very potrait shape. It fits in clouds and a dark sky in the background. An arrow made from four pieces fit in the centre of the image. The pieces to the geometry are made by cut up pieces of the same image. Its said that Liam Wylie most likely chose mountains because of his canadian life style. Canada has a very arctic style enviroment in some places. Giving Liam wylie freedom of this hospitable landscape so he can create interesting photos in a geometric style. Liam Wylie studied at OCAD university, he studied drawing landscapes at the life drawing and painting. I will attempt to mimmick Liam Wylies work by using the image to create rigid shapes just like the ones Liam Wylie uses. I will use use different shapes to make the bigger shape just like wylie. I have decided to make my images out of rigid shapes like squares, rectangles and triangles. The process I'll use is rearrange parts of an image. Ill start with the base layer, then ill cut out a shape using magnetic lasso and then use Ctrl+J to create a new layer. The new layer will then be moved around and copied to create a new shape on the top of the bottom layer. |
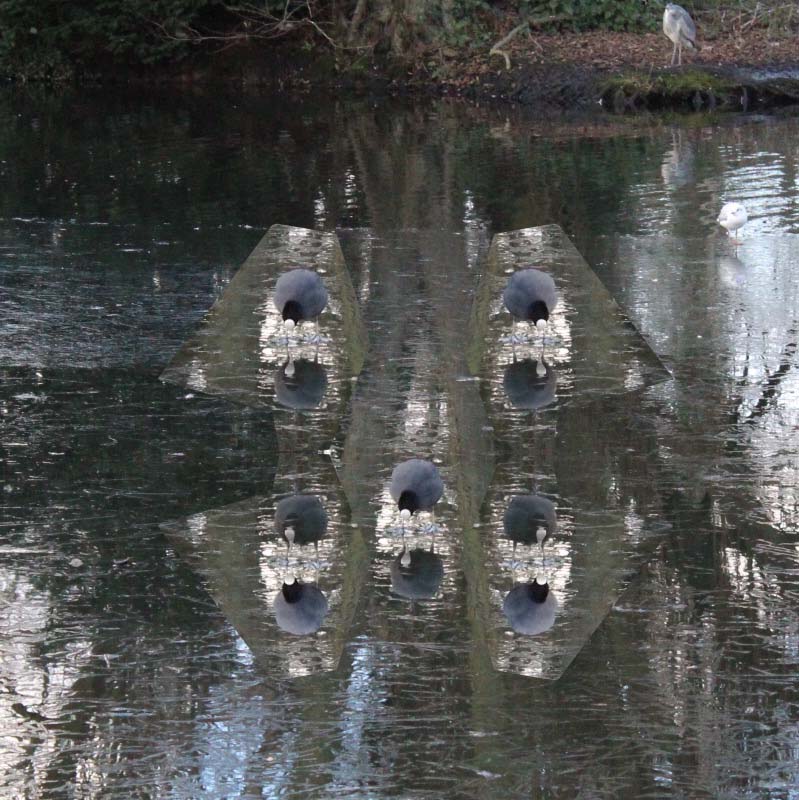
Homework shoot
For this shoot I travelled to Reading University where my brother is studying. I decided to go down to the lake where there is a lot of birds to experiment with.
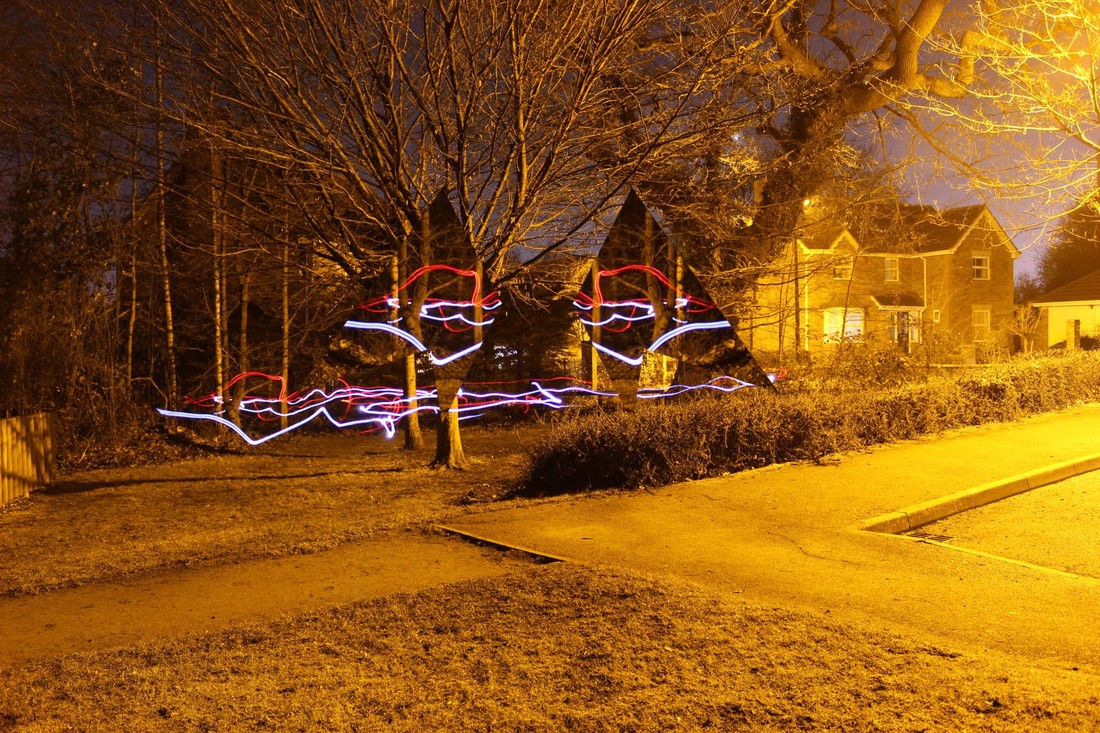
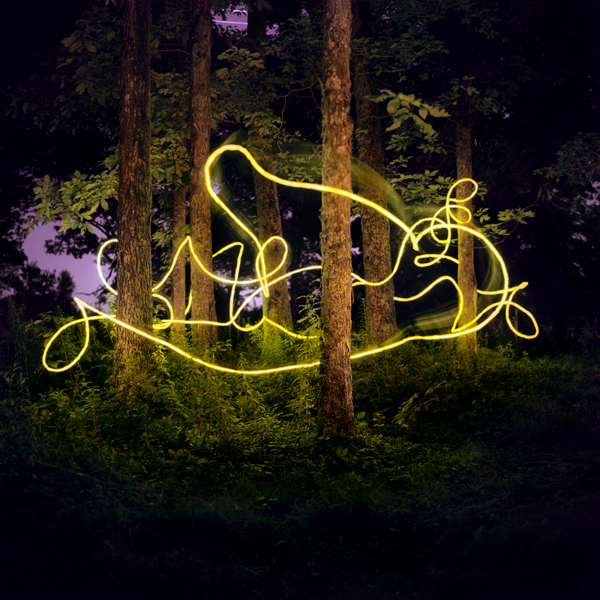
Also I experimented with light trails at the woods near my house.
Also I experimented with light trails at the woods near my house.
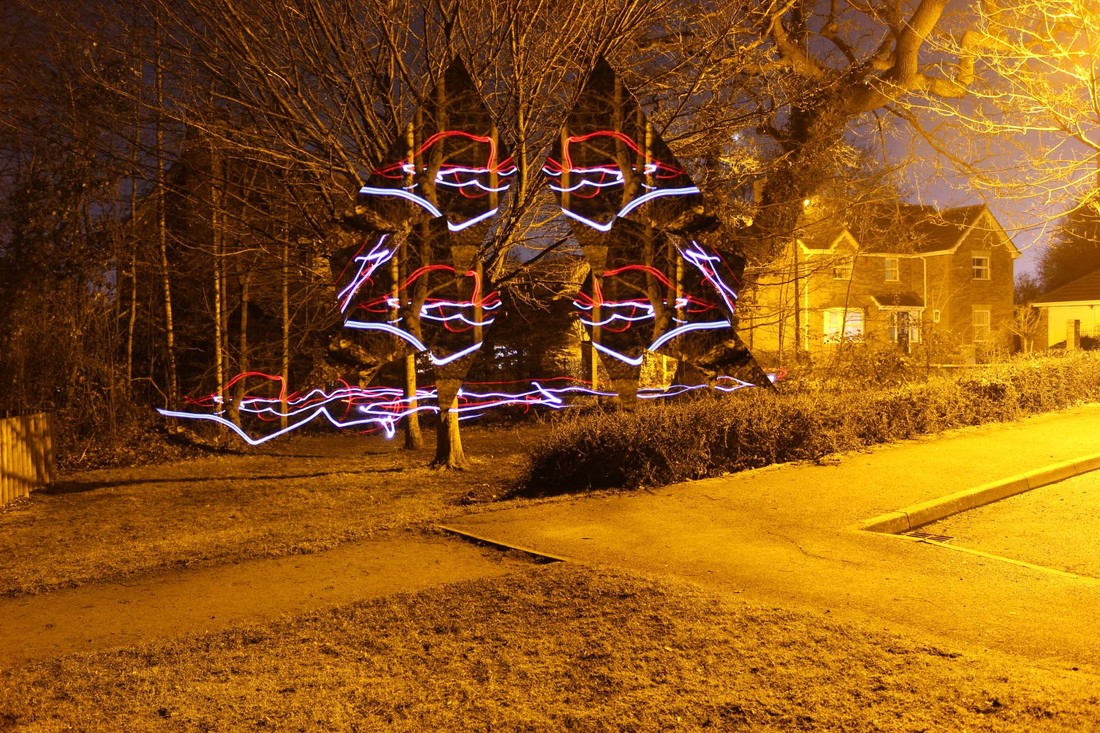
BARRY UNDER WOOD
Born in 1963 in Delaware, Barry Underwood received his Masters in Photography from The Cranbrook Academy of Art. He has also been in residence at the Banff Center for the Arts, in Canada, I-Park in Connecticut, and the Headlands Center for the Arts and the Center for Land Use Interpretation in Wendover, Utah.
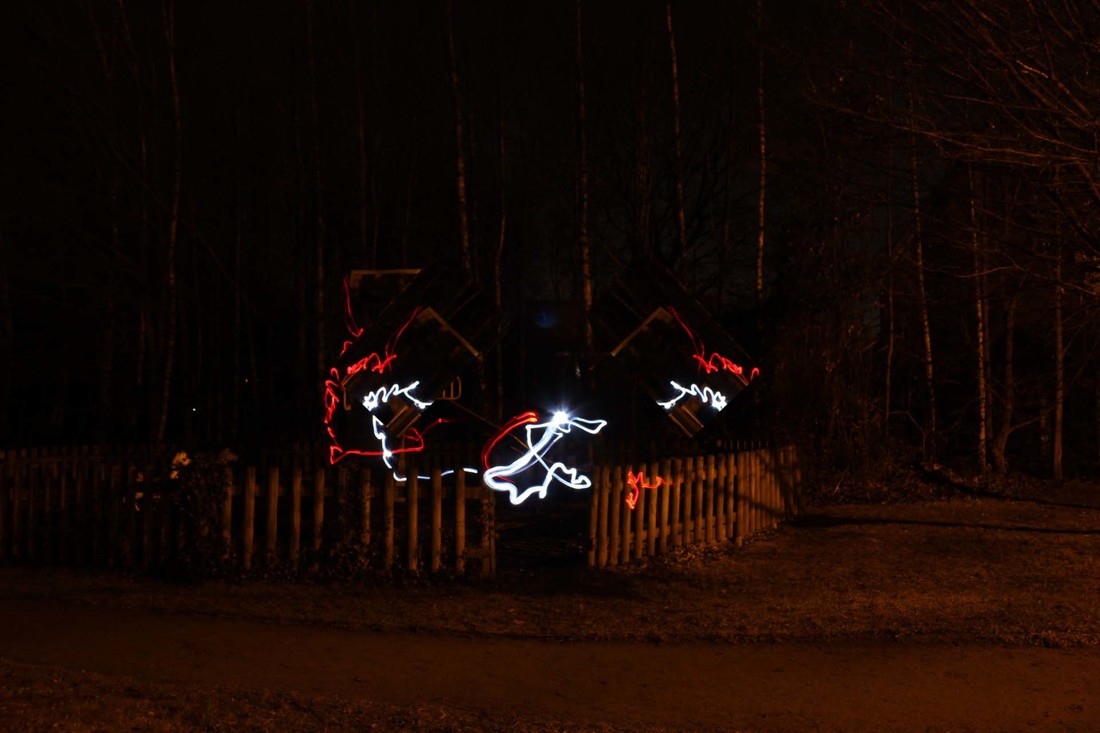
Barry Underwood Drawing inspiration from early theatrical training, and influenced by methods of staged photography and set design, transforms ordinary landscapes into something out of science fiction. The artist uses LED lights, luminescent material, and other photographic effects like long exposures to create amazing abstract scenes off light both accidental and incidental.
When he creates these images he uses a selection of lights, he also talks about how he uses a balance of light pollution and natural scenery. He also often considers how he needs to protect the space he uses and how he must not damage any trees/disrespect the landscape.
In this image he has used light pollution to create the right balance of lighting. Hes also used a yellow LED. However before he turns his camera on he designs a pattern to use. He exposes his photos from 15 mins-6 hours depending on weather, lighting and how he wants the image to appear.
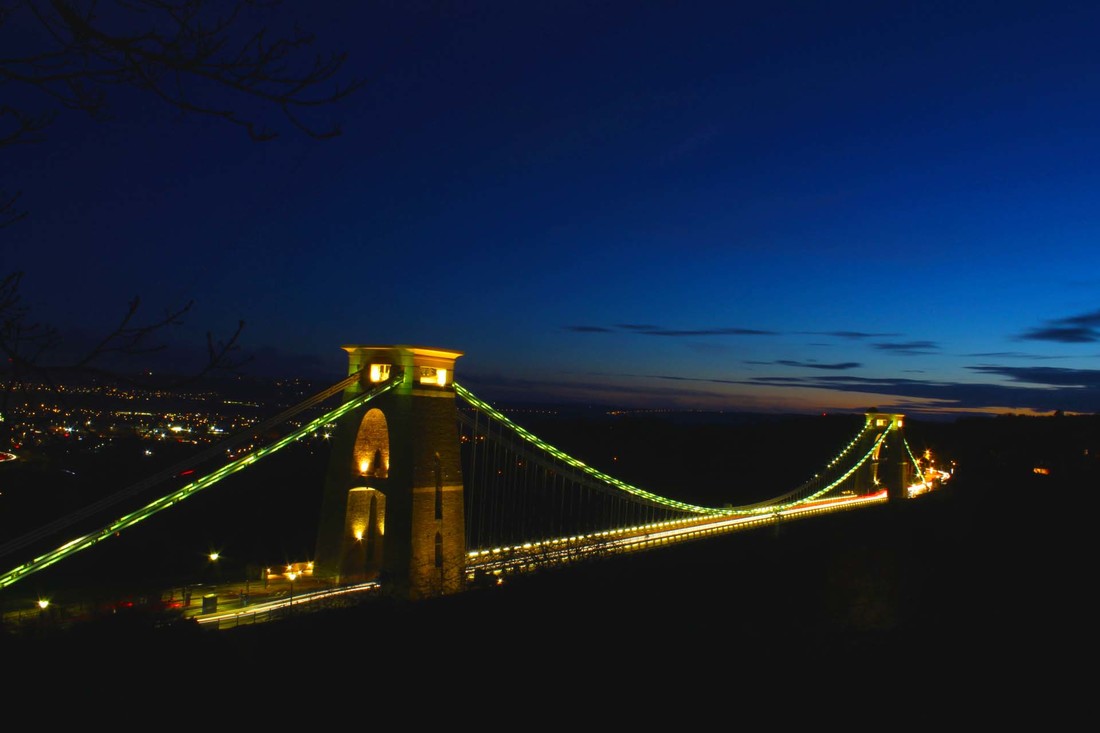
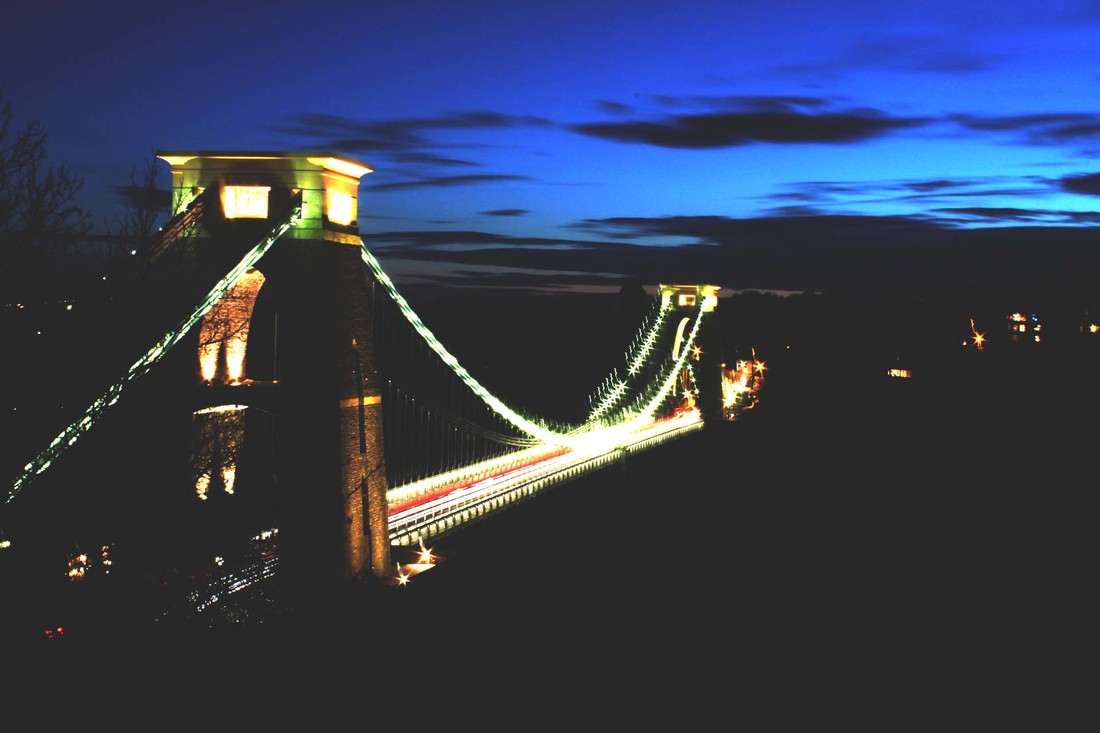
First Shoot
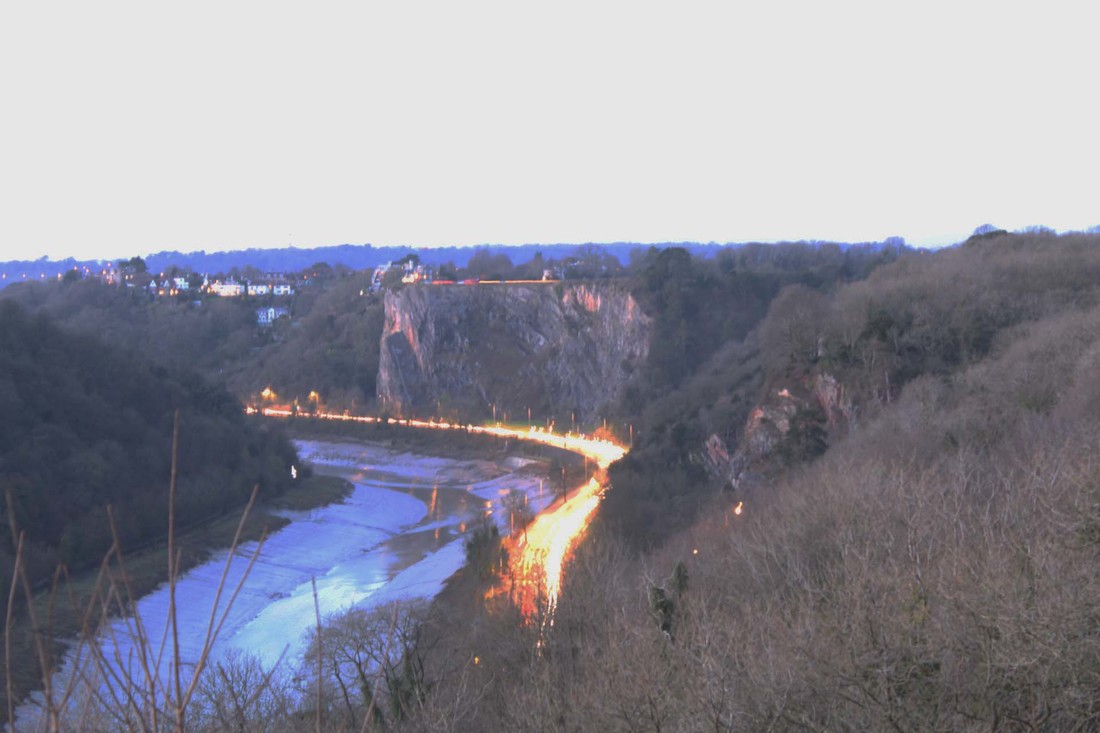
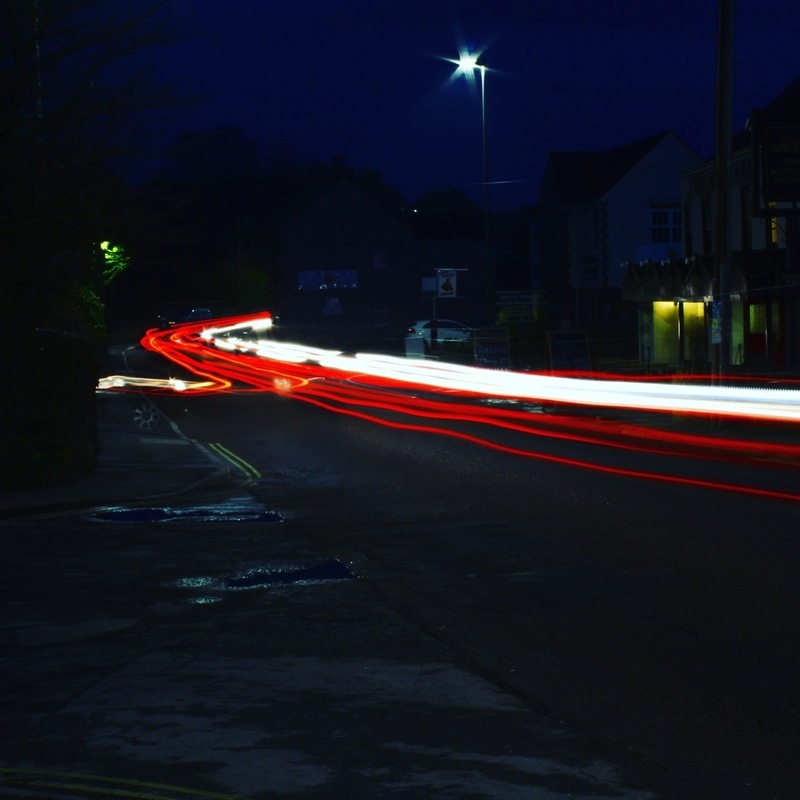
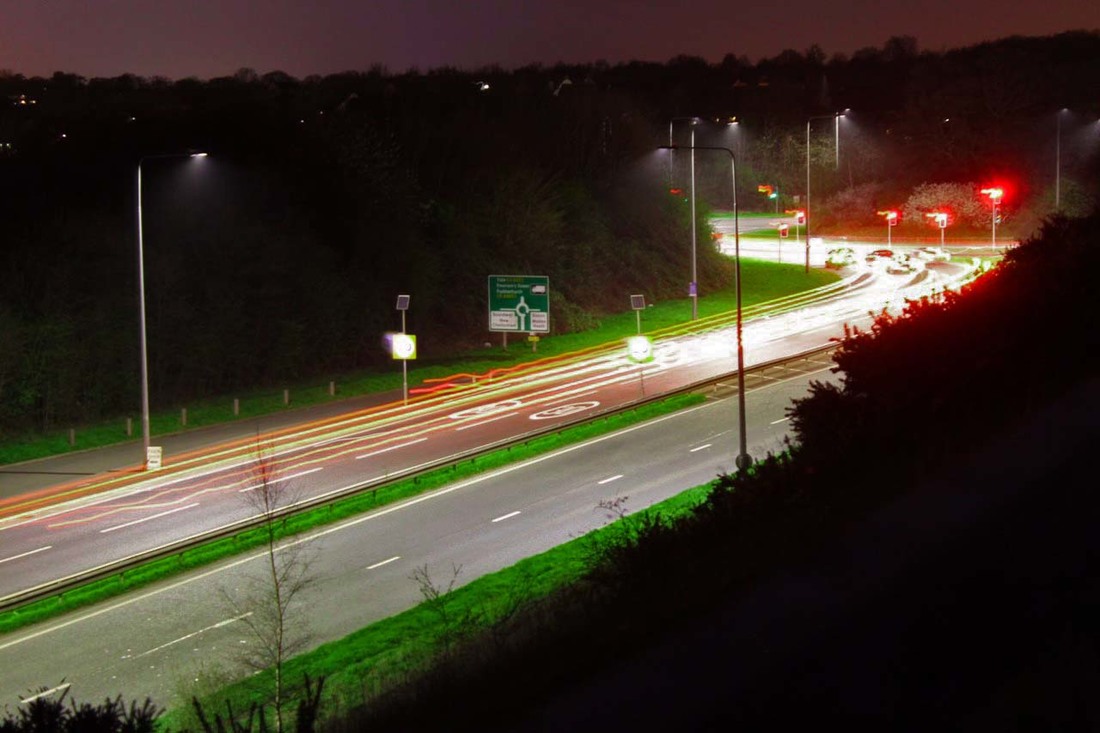
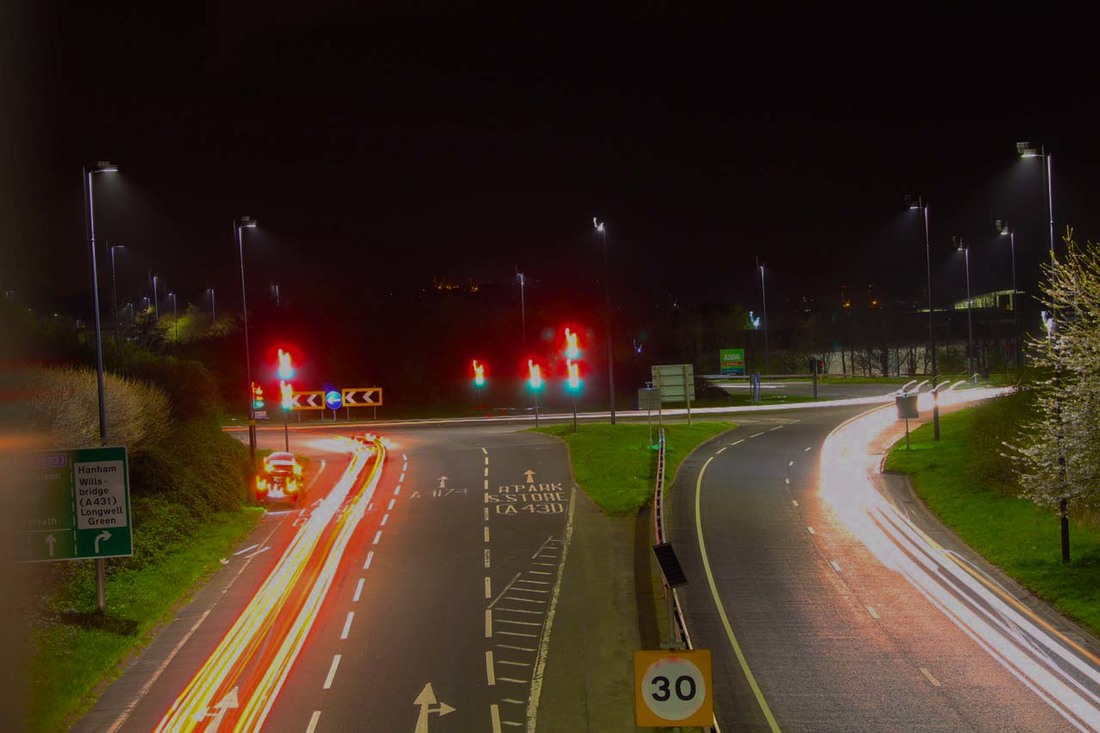
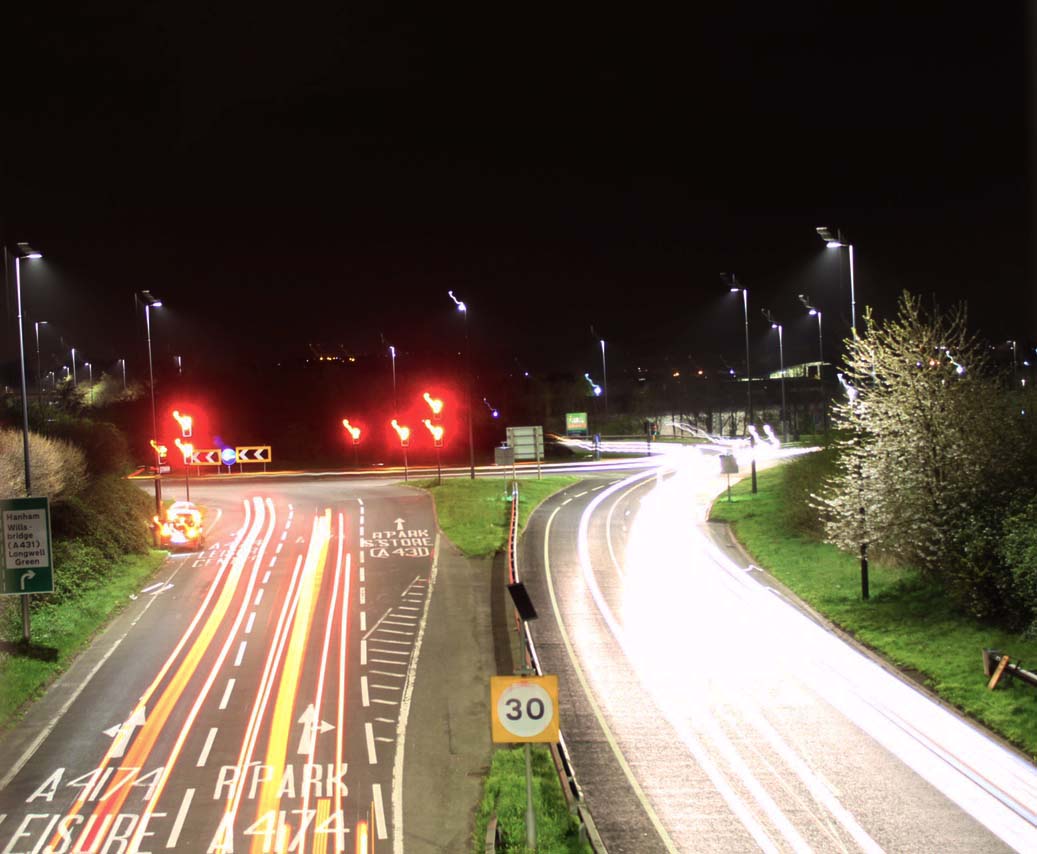
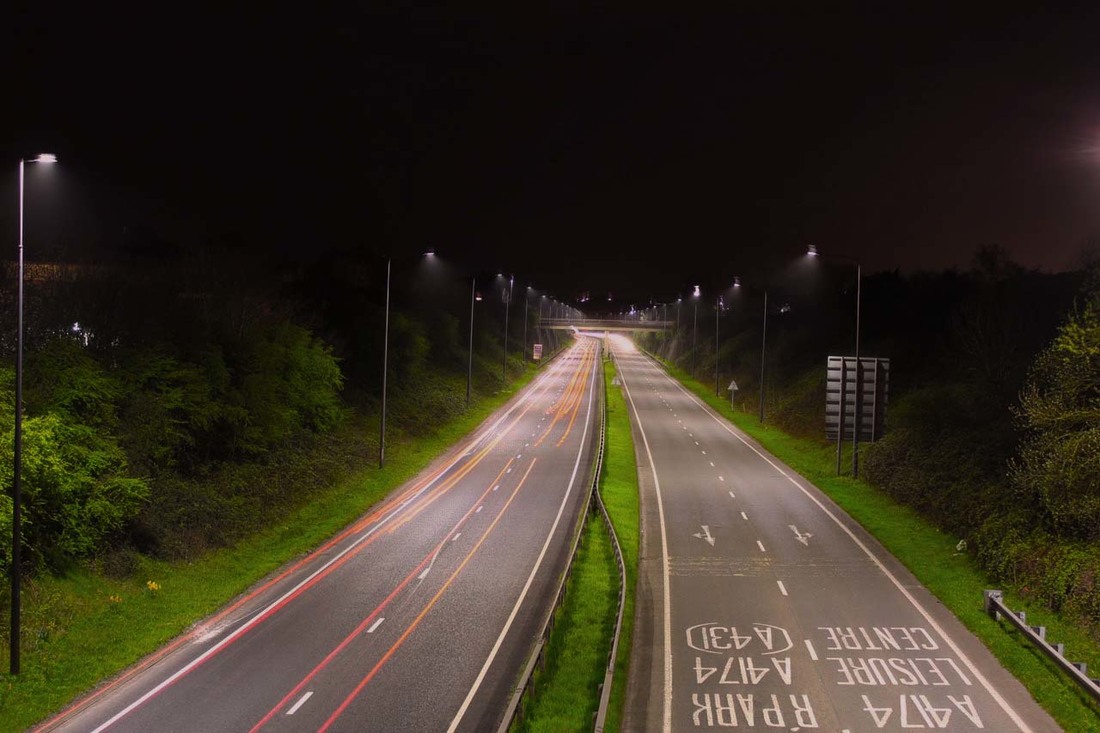
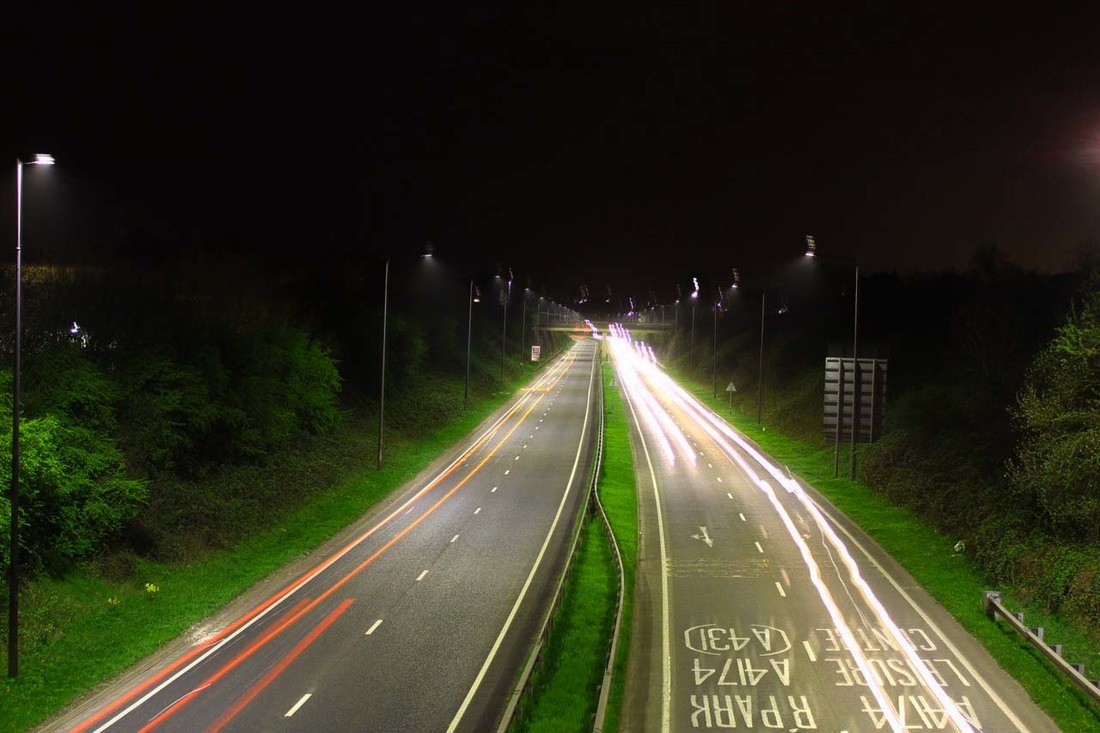
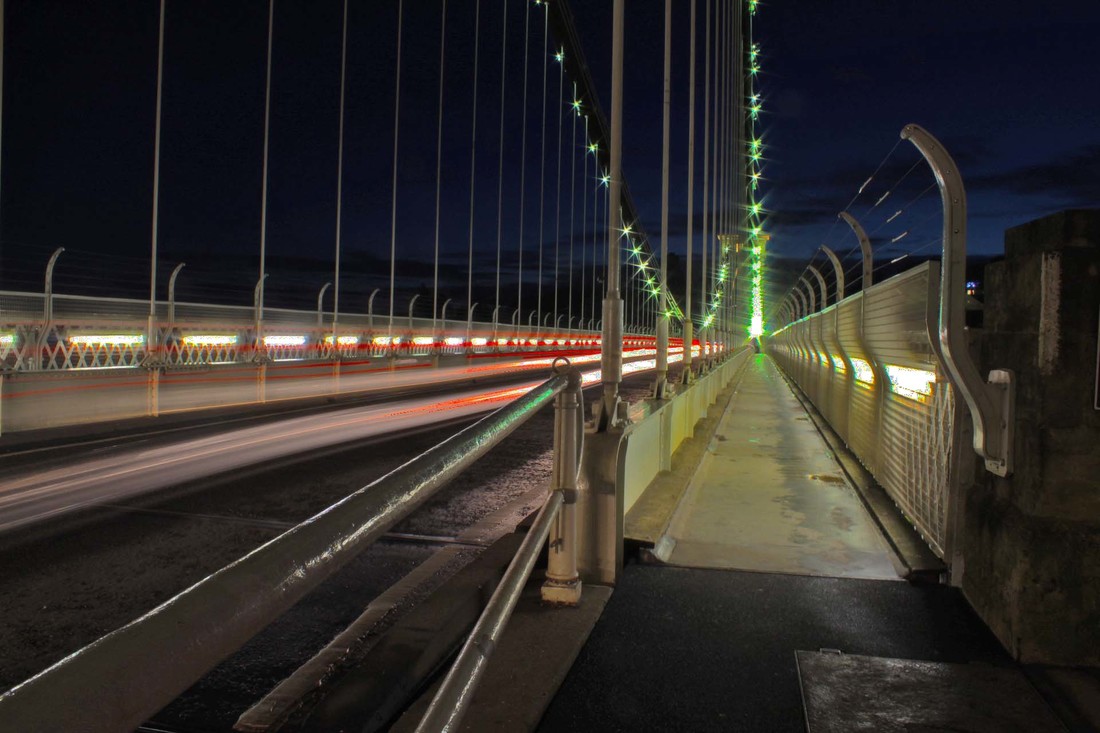
On this shoot I returned to Clifton to attempt capturing light trails on the bridge and city centre, I decided to experiment using cars to create my light trails.
I managed to get some good photos as it got darker. My favorite photos are of the bridge mid sunset. To take these photos I used my 1300D DSLR with a shutter speed of around 15-30 ISO of 3200 and aperture of f:8 and 15 seconds for best results in the dark. My biggest difficulty was balancing the exposure because if you want to capture long light trails you need a long exposure but if there is a lot of ambient lighting and plants you get an over exposed photo with blurry plant.
I managed to get some good photos as it got darker. My favorite photos are of the bridge mid sunset. To take these photos I used my 1300D DSLR with a shutter speed of around 15-30 ISO of 3200 and aperture of f:8 and 15 seconds for best results in the dark. My biggest difficulty was balancing the exposure because if you want to capture long light trails you need a long exposure but if there is a lot of ambient lighting and plants you get an over exposed photo with blurry plant.

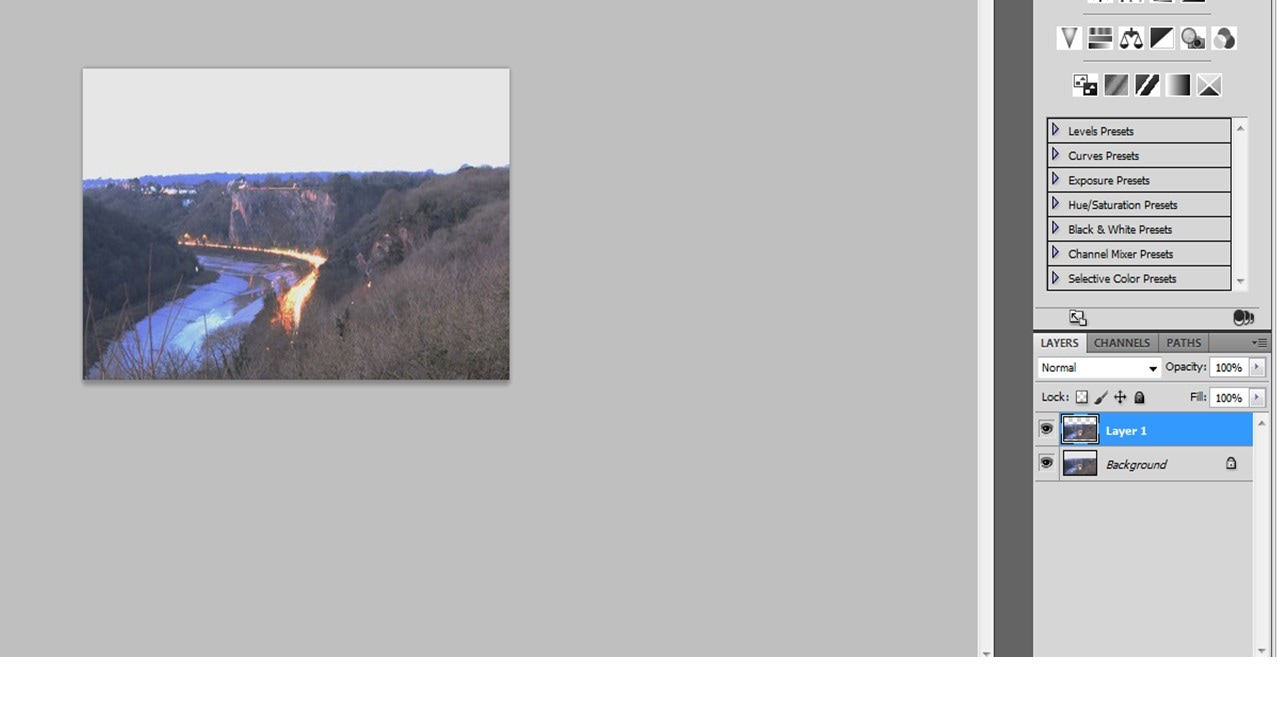
Editing
I realized that in a lot of Underwood's work he has a blue/purple sky, so to fix the bleach white sky I would put in a sky that doesn't take away from the photo and is more pleasant to look at.
I began by creating a new layer, I used polygon lasso to cut out everything but the sky. Then once it was selected i used ctrl+j to create a new layer.
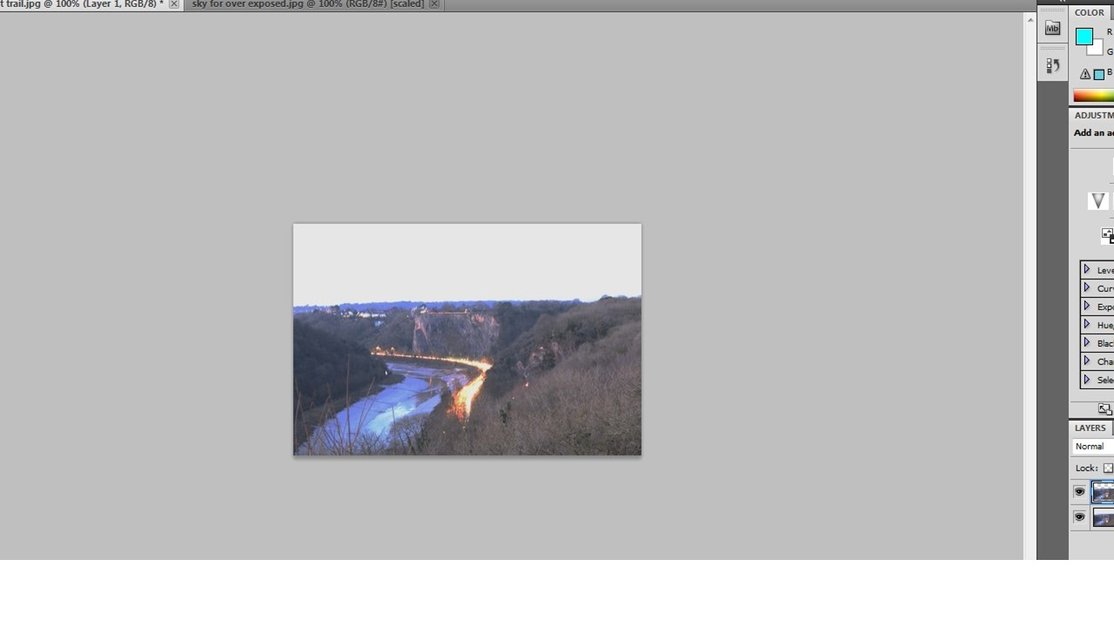
Then I opened a photo of the sky I have in Photoshop.
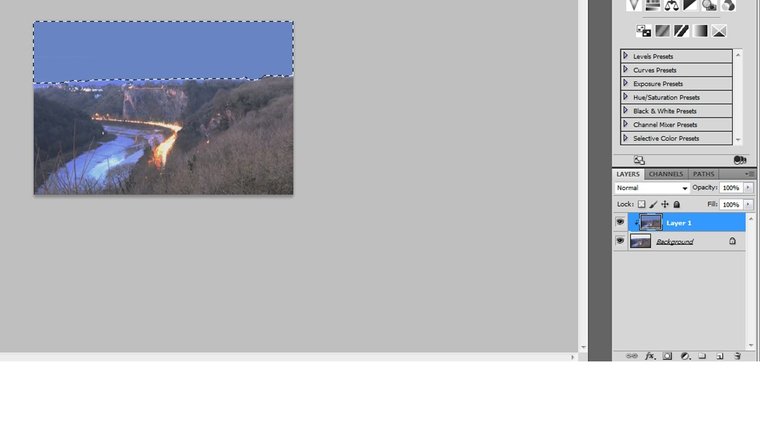
Then I dragged the image between the two layers and merged them.
Finished Product

Prep for next shoot
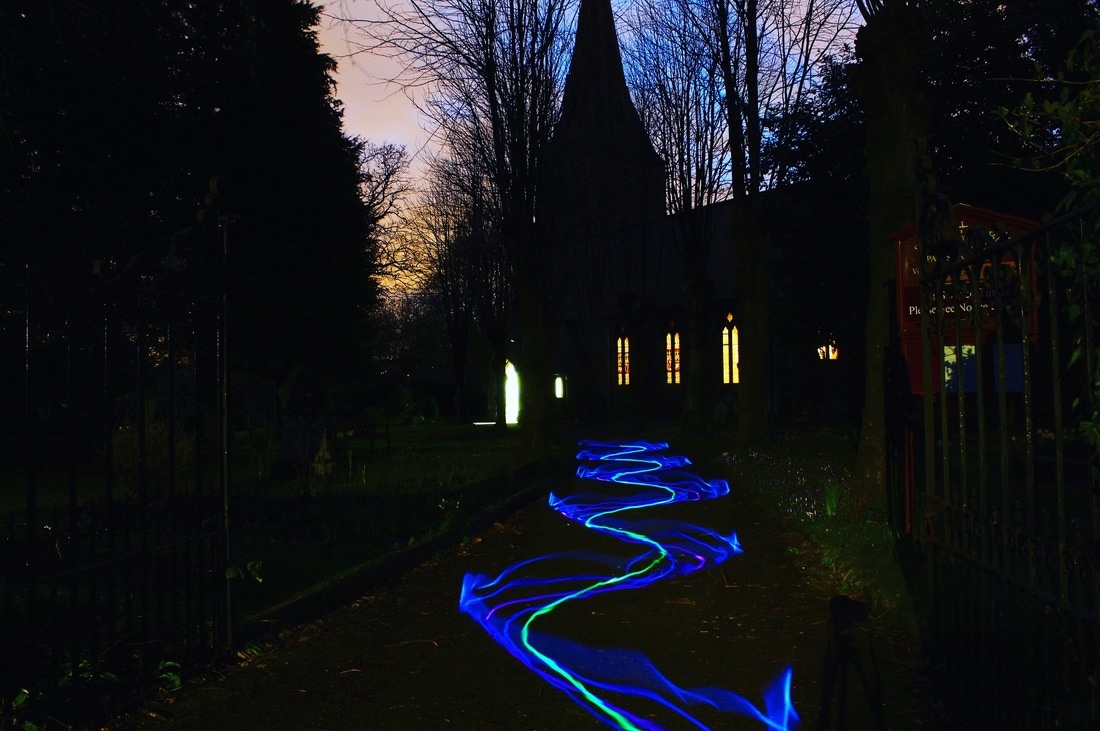
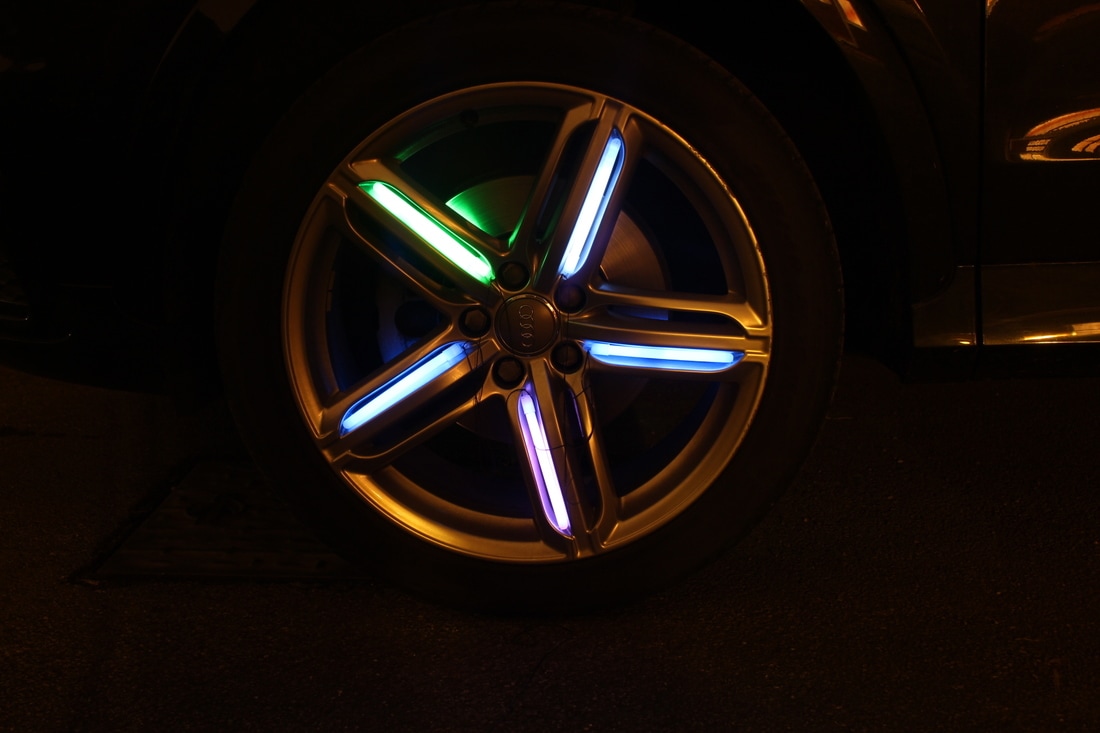
For my next shoot I am going to experiment with luminescent materials like glow sticks. I will go to Warmley and use them to interact with the scenery. This will help imitate Barry Underwood's work. I will probably use a fairly long exposure due to it still being early in the year so its more dark out.
Barry Underwood Shoot

Critique
I think this shoot went reasonably well due to being able to experiment with different light forms. I had to create tool to create these trails though, how I did it was tied long chains of black plastic string that came with the glow sticks, then I tied other lengths of black plastic string to the main chain, the smaller bits have slip nots on the ends so I could tie in the glow sticks. Then all you have to do is set up along exposure and drag the string around. My shoot could be improved if I went to a range of different places.
David J. Carol
|
David J. Carol was born New York city in 1958, he studied at the School of Visual Arts in his home city. He worked under Lisette Model where his first assignment was to work for the Photo Bank Agency at the age of 26 where his work got posted to Getty images.
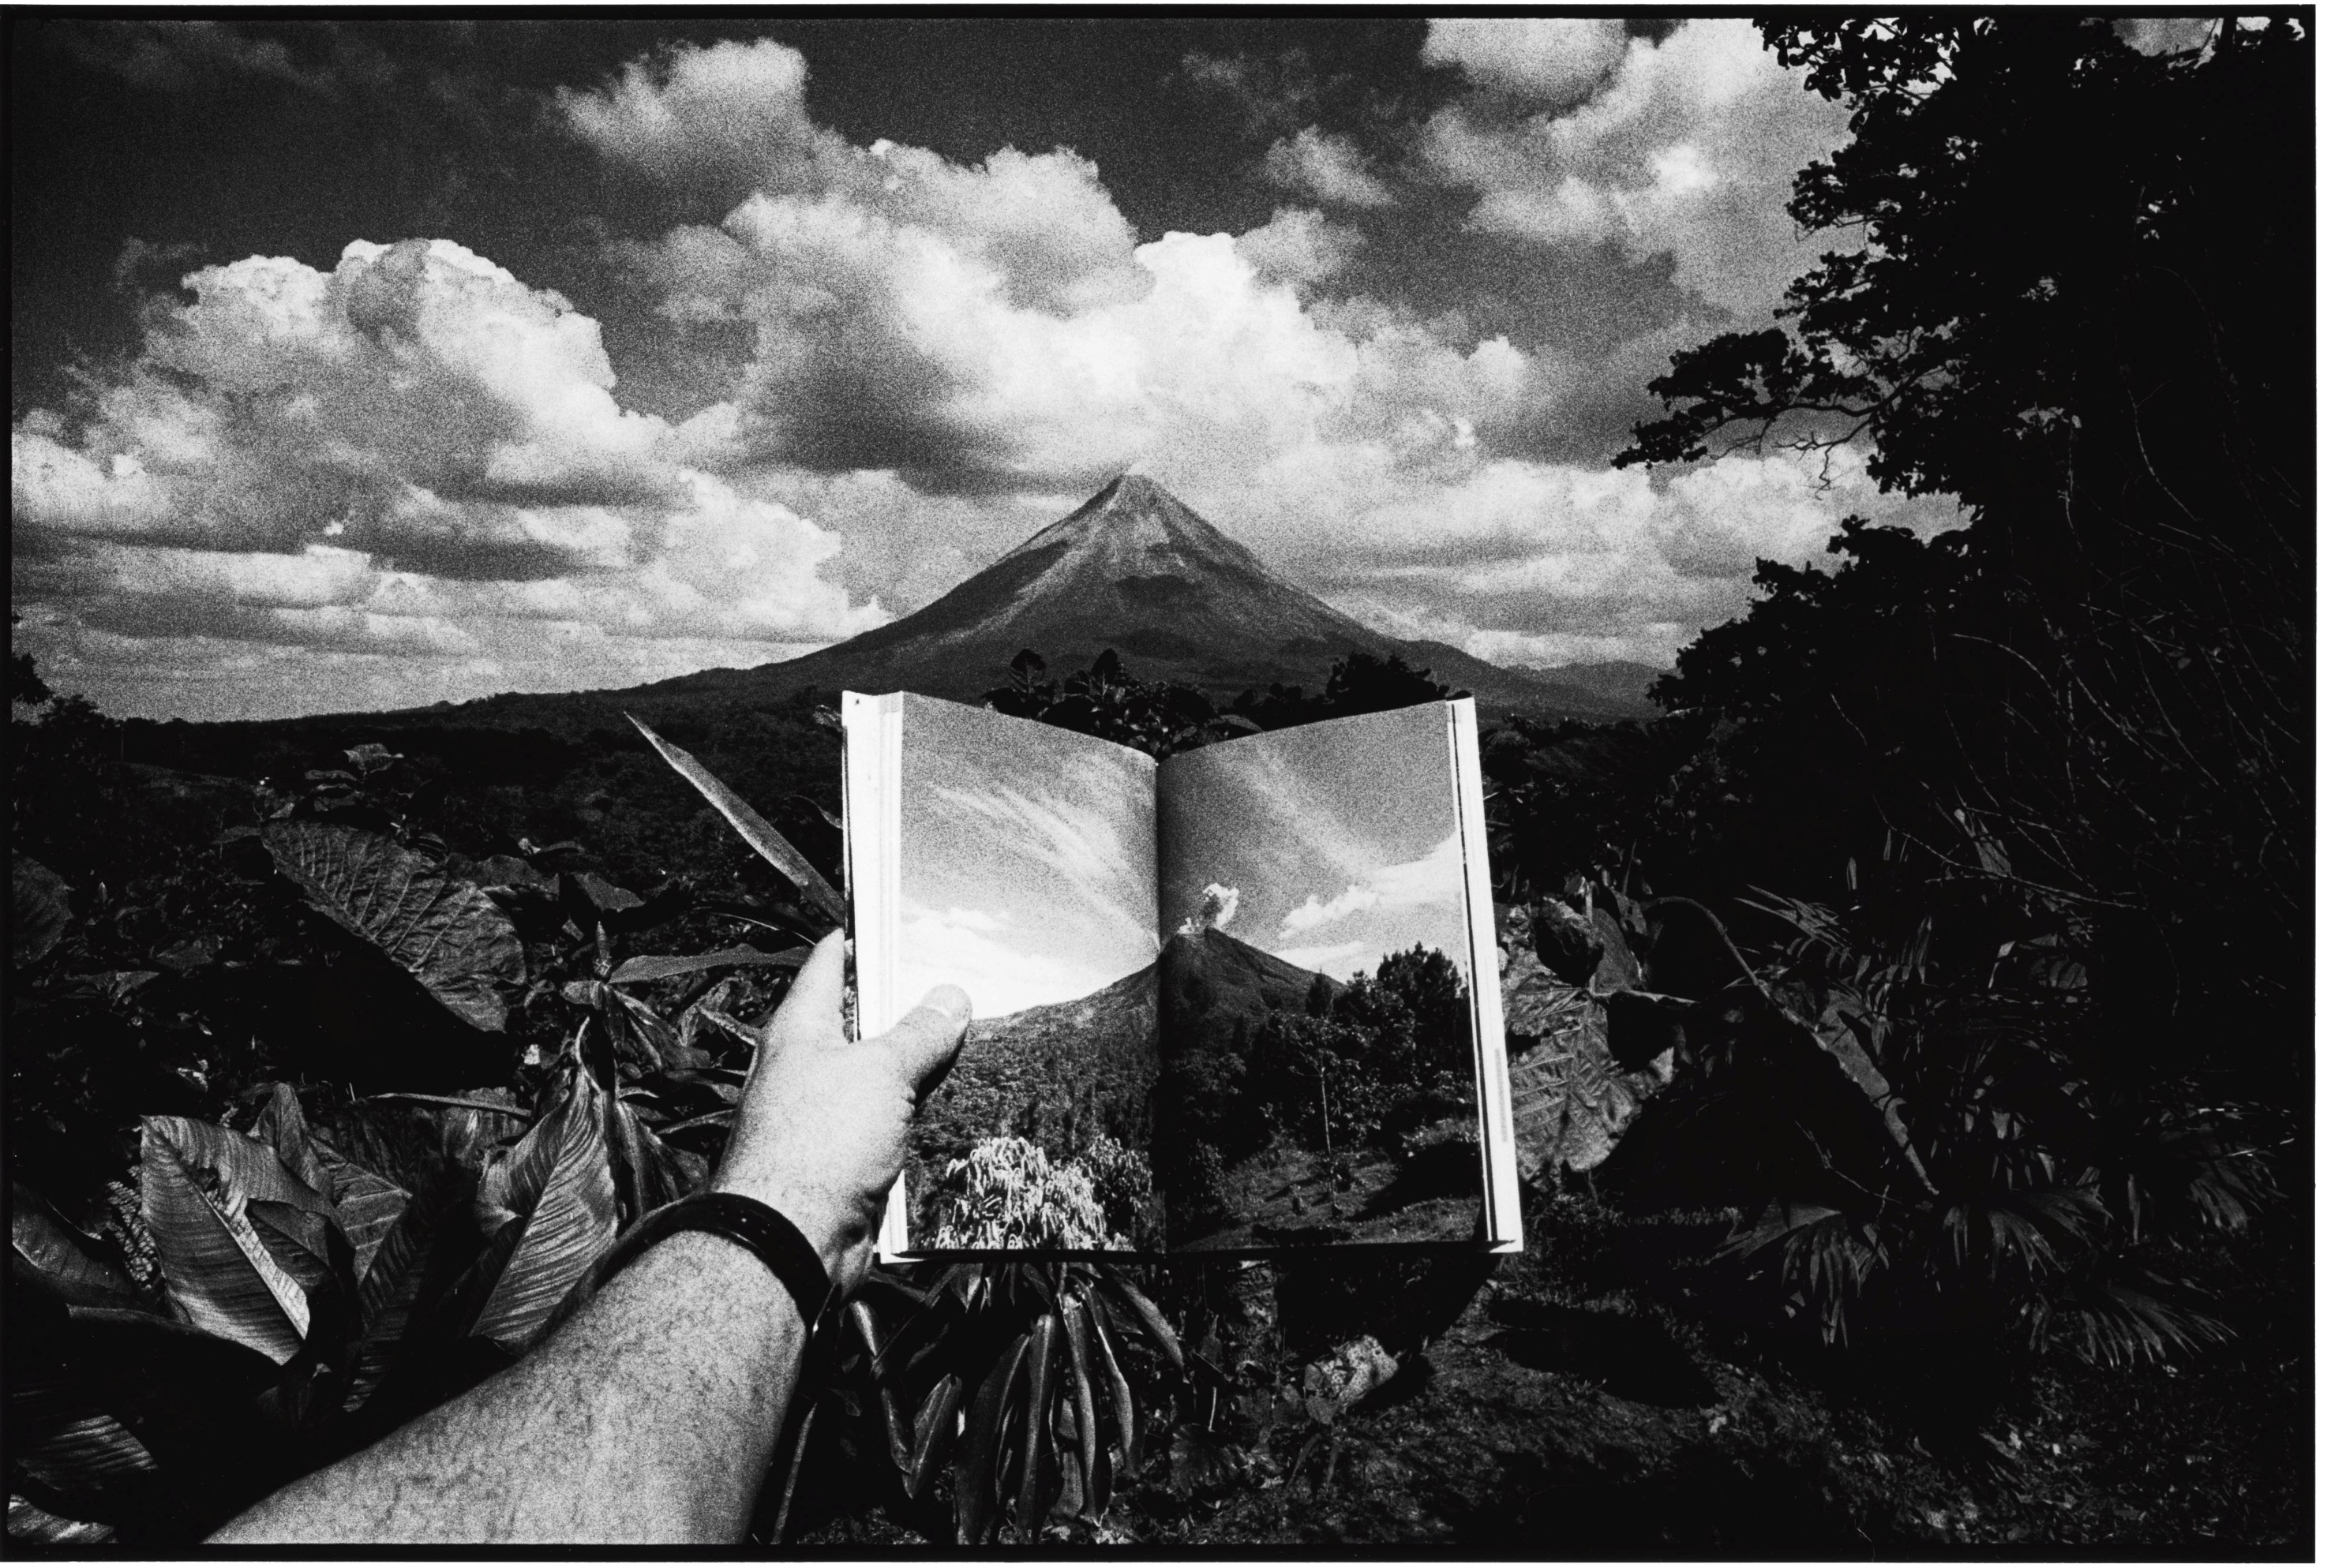
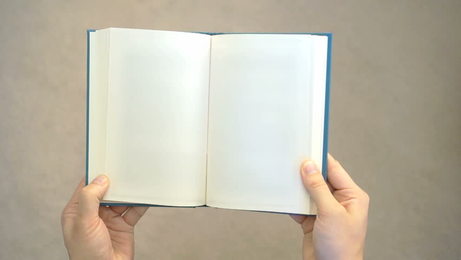
David is a photographer first and foremost. He currently works daily in the real world of commercial photography as the Director of Photography at Out front Media as well as being the Editor in Chief at a new imprint that publishes high quality photography books. He tries to make he his photos as obscure or as unique as possible. I will experiment with his work by incorporating light trails, with his photo where he uses letters in a bleak landscape i'll use a light trail. Also in the photoshop photos where he uses a book with the same image i'll use a light trail instead to follow on from Barry Underwood. |
David. J Carol: experimentation shoot 1
critique: Personally I think this was a great Idea to experiment with, it gave me a new technique to try however I just don't think it fits. This shoot seems to steer too far away from geometry, also trying to create the hands with the book was a very difficult task. It took lots of attempts to create the hands photo which takes away from looking into geometry.


Refinement/Critique
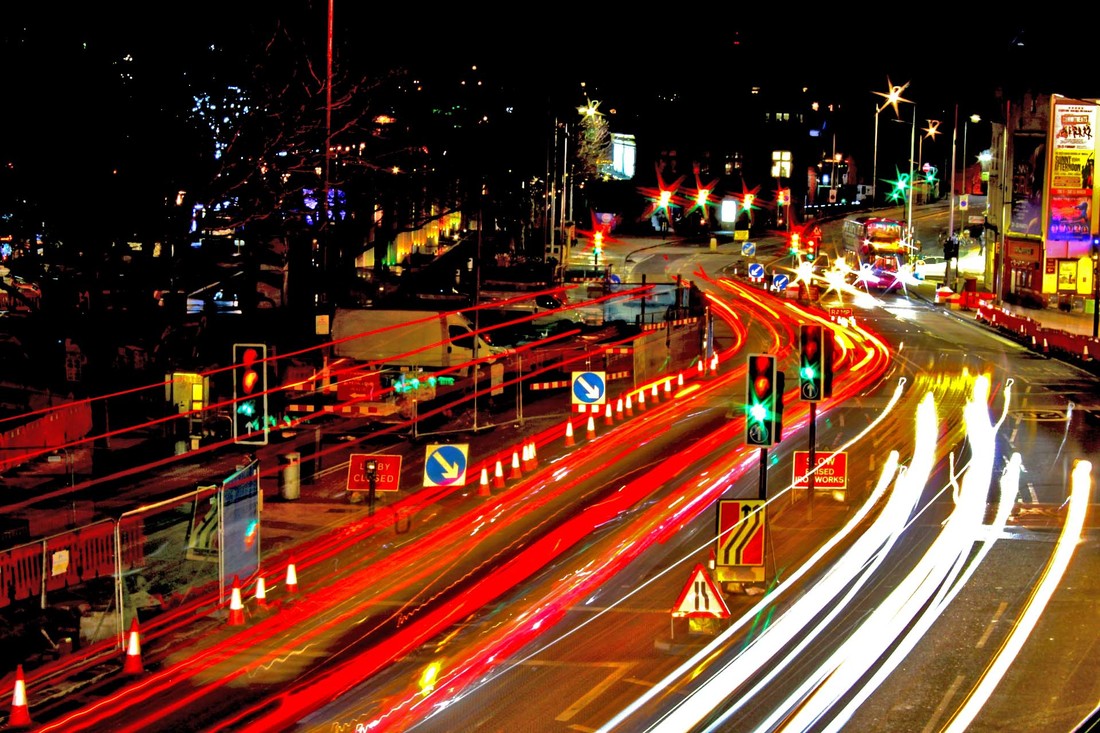
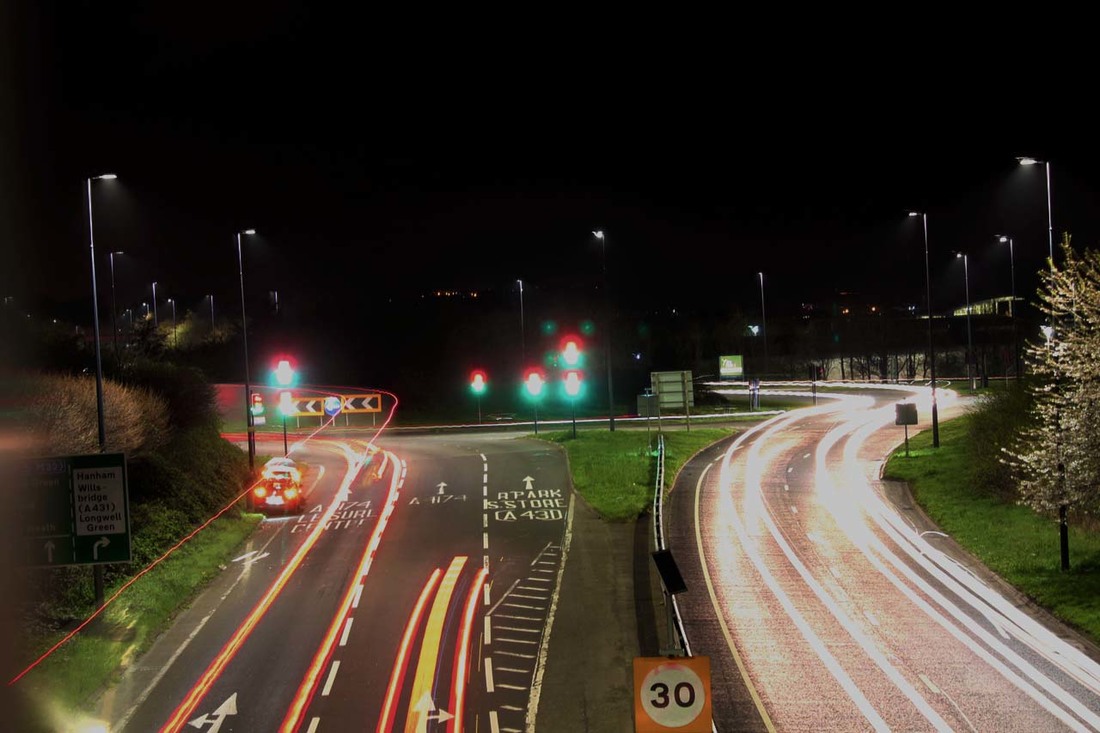
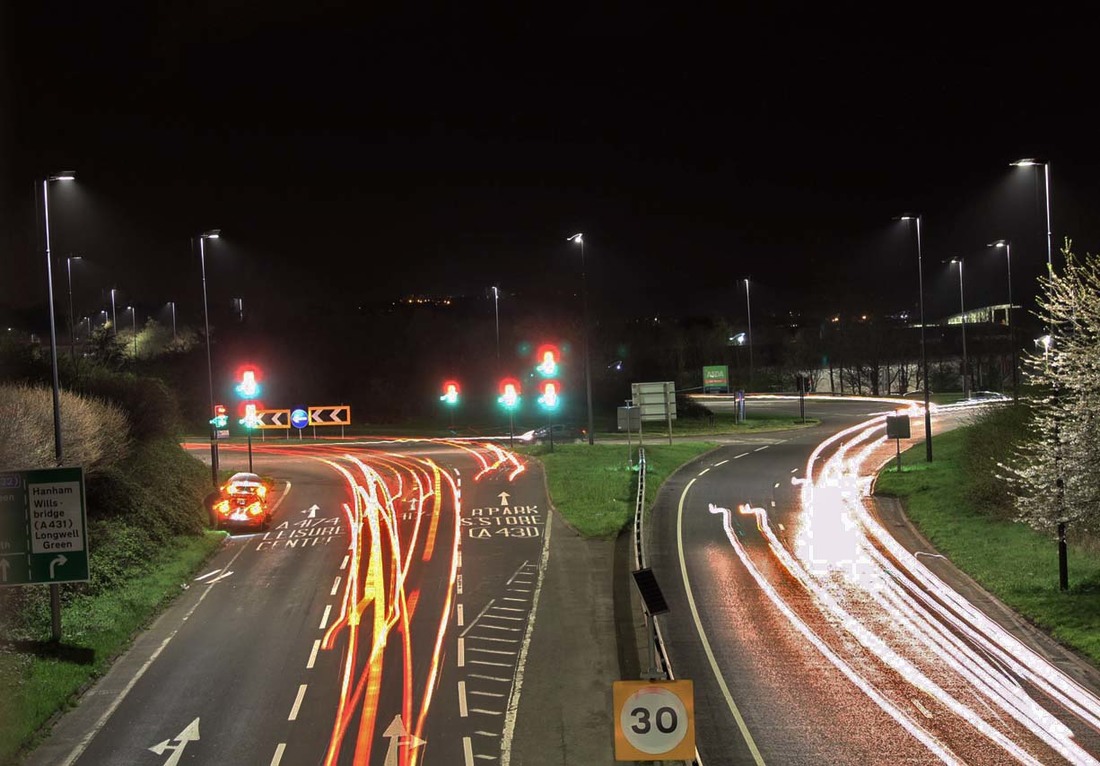
This shoot was conducted by visiting bridges near the ring road in Warmley and Longwell Green. I used a tripod and camera with a long shutter speed capturing the cars going past. This shoot returns back to the more classic style of light trail. To edit and experiment with them I'll put them in a book like my previous shoot. I may even make a geometry photo inside the book. This Photo shoot was actually quite difficult and dangerous to conduct, every bridge I visited had railings on and big concrete blocks to prevent people from jumping off. Luckily the block was just big enough for my tripod to sit on. However I had to climb up to man the camera from on top off the cement block because the camera connect app wasn't working. The other problem was that two cars had crashed into the back off each other so in some of these photos there is two cars just stopped on the hard shoulder.

Edit
I started off by testing with a photo from google. I made sure there is no water marks and that I am legally allowed to use the image.
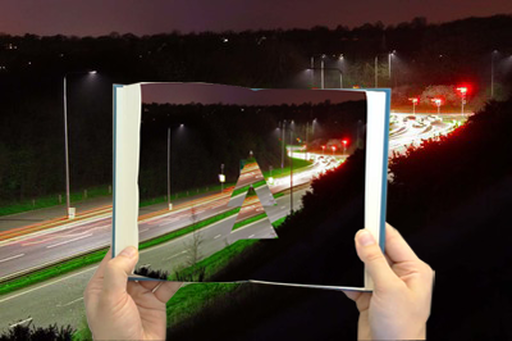
Then opened photoshop, I begun by creating the geometry style photo and saved as a new file.
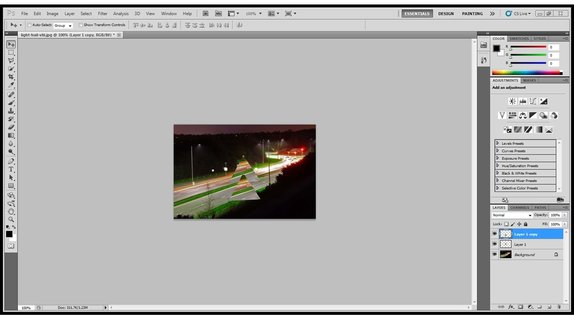
Then i opened the book photo, I dragged the first photo across and made it fit in the page. I used the puppet warp for this part to make an accurate shape.

Then I cut out the hands and book and drag the photo over. This is my end product.
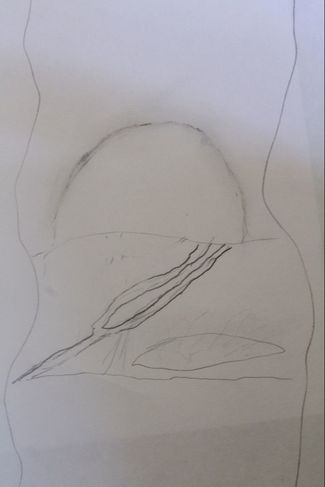
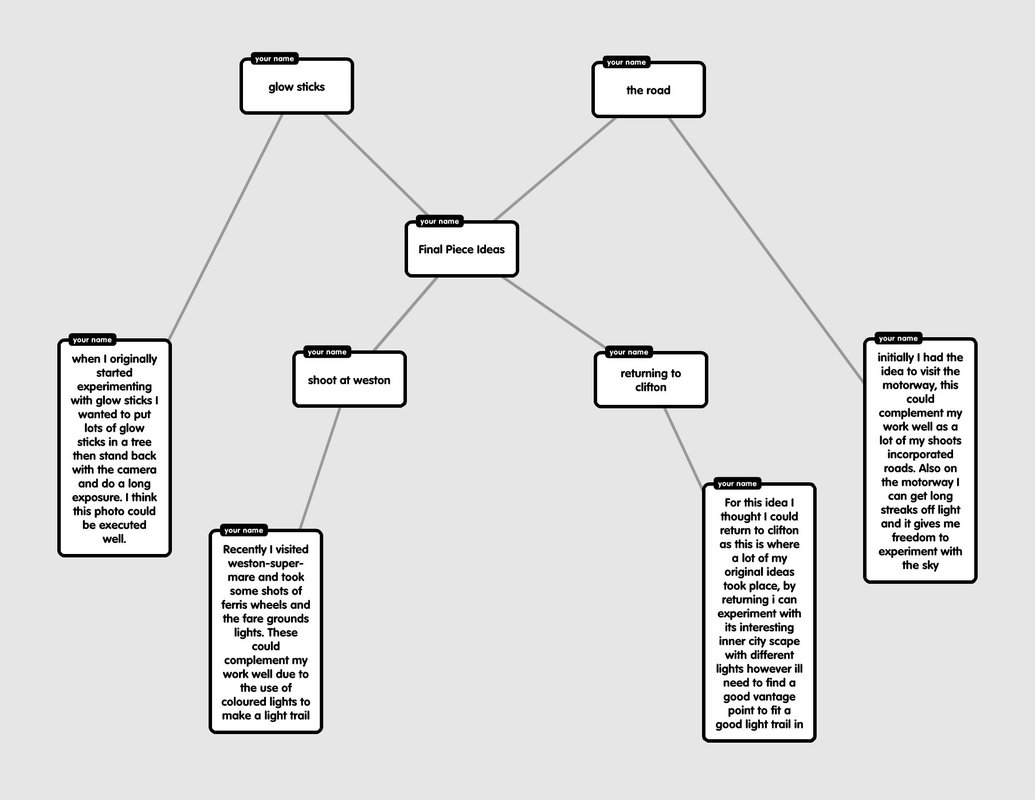
Final Piece Ideas
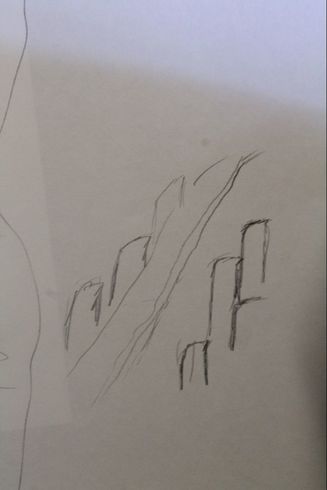
This Drawing is a sketch of an inner city hill. If I choose to create this piece I will visit town and use the cars to create my light trail. I will use a long shutter speed and a tripod to capture the trail.
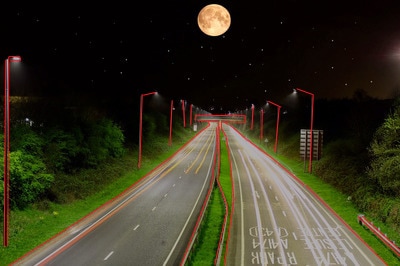
This is another Barry Underwood inspired piece, for this piece I would photograph the moon. Then go to Warmley forest and do a light trail with glow sticks. Then on Photoshop i'll layer them so the moons at the back.
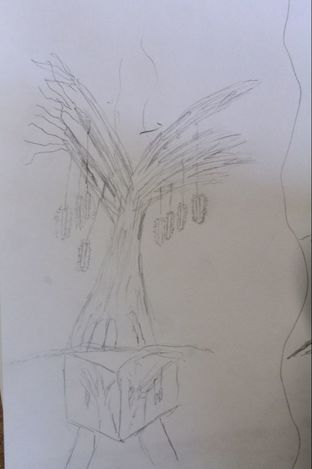
This sketch is inspired by David J. Carol and Barry Underwood. The idea is finding a tree, hanging lots of glow sticks from it and doing a long exposure. Its important to make it a long exposure to make sure the glow sticks don't show. Then Photoshop in my hands holding a book with the photo on the pages. Or actually print the image onto the book for realism.
Popplet for final ideas
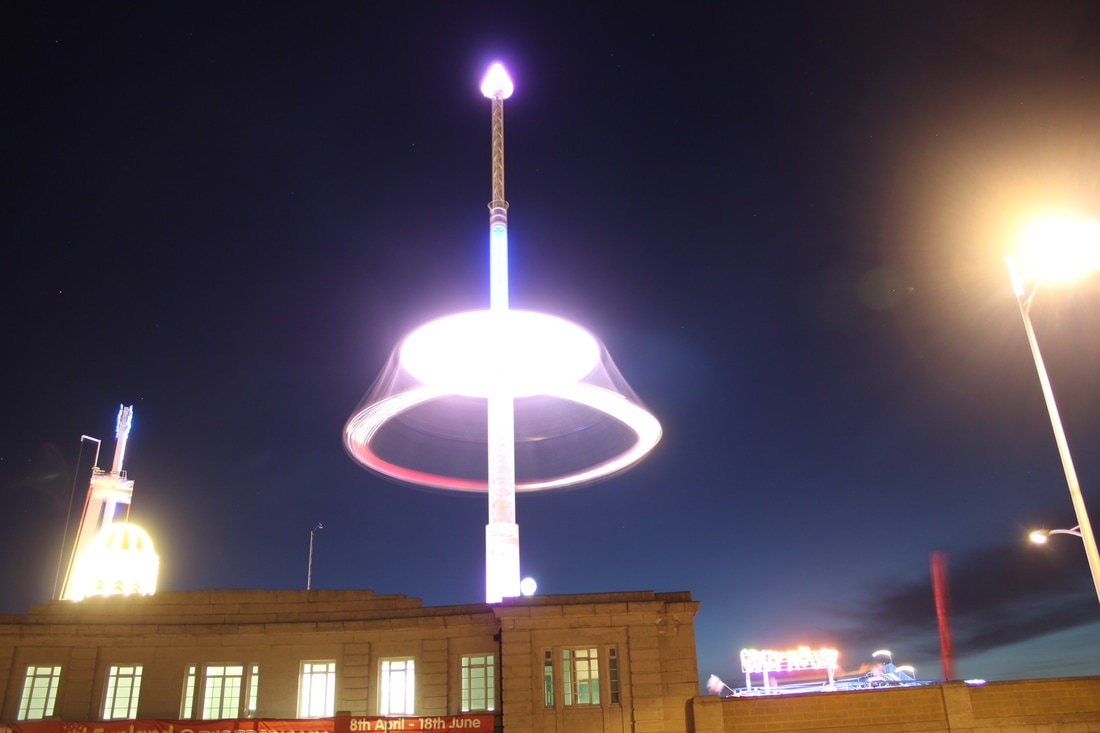
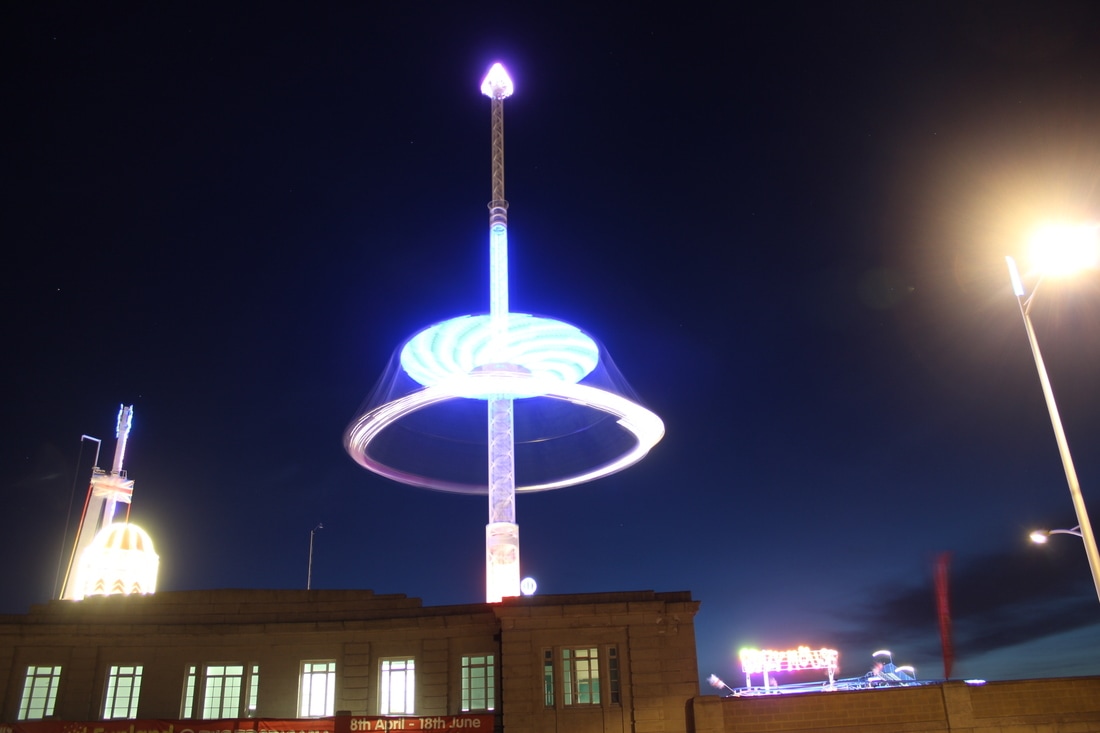
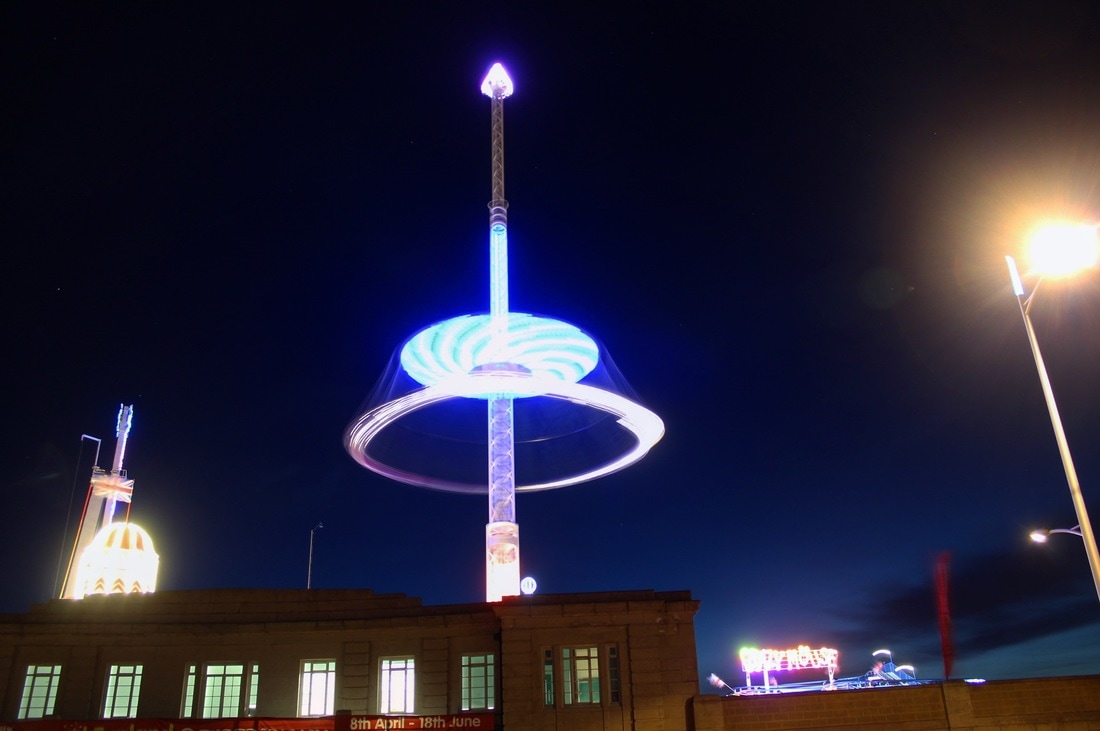
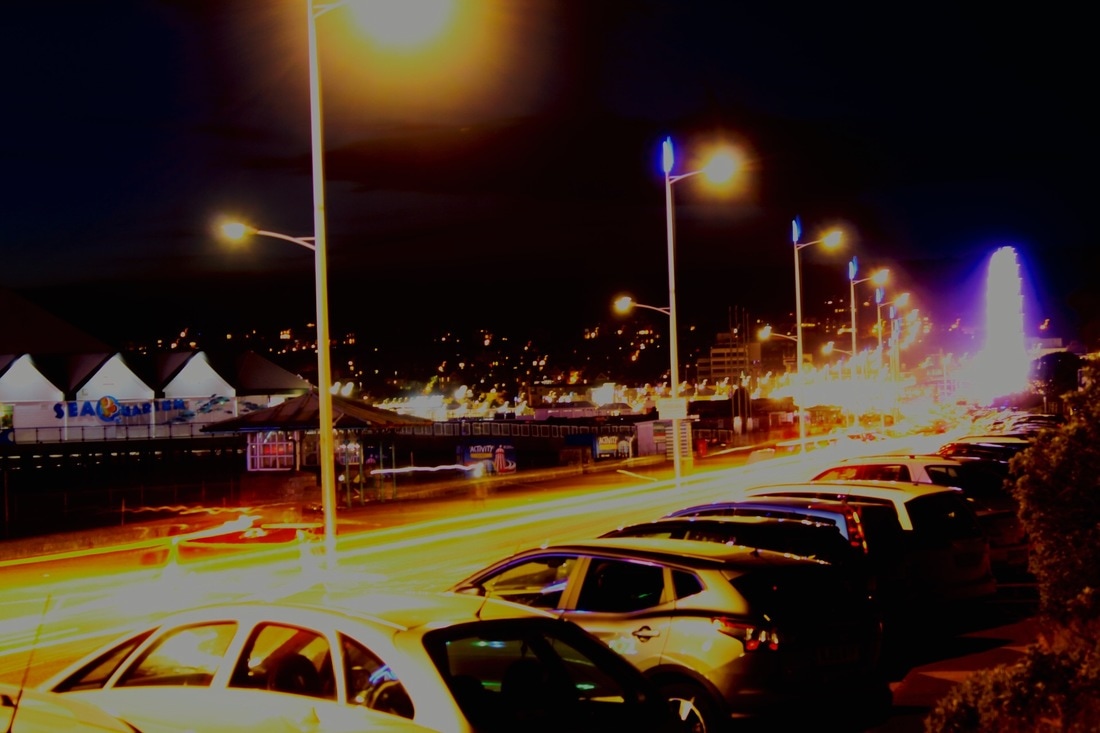
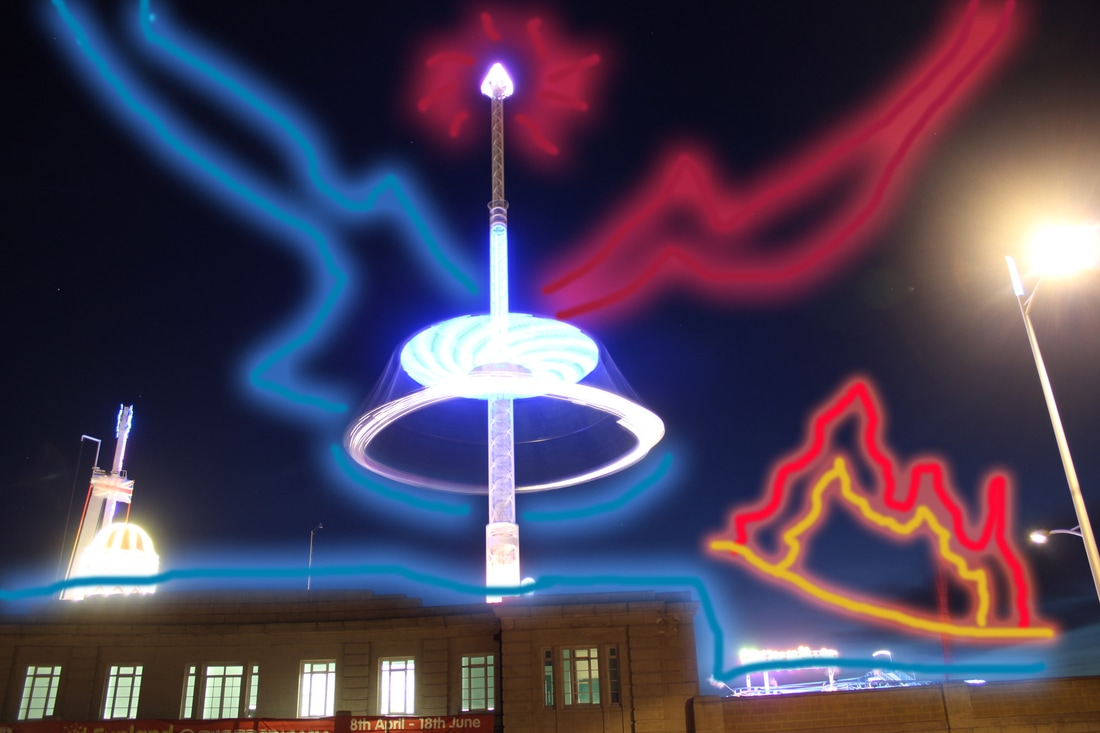
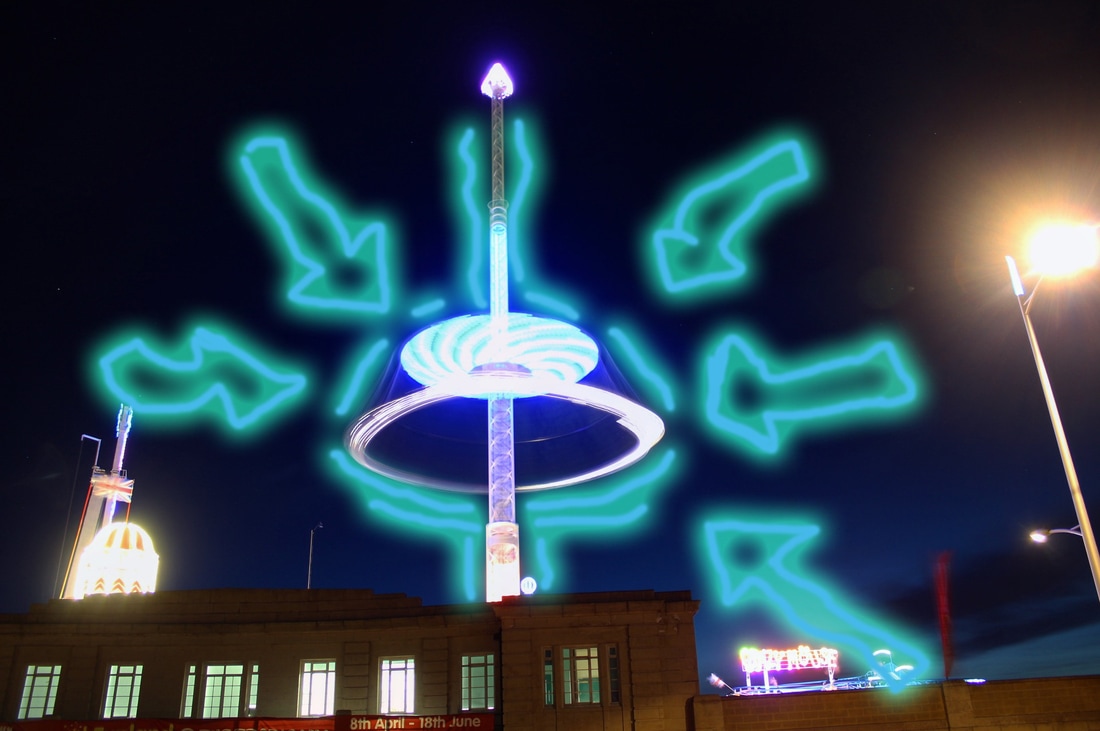
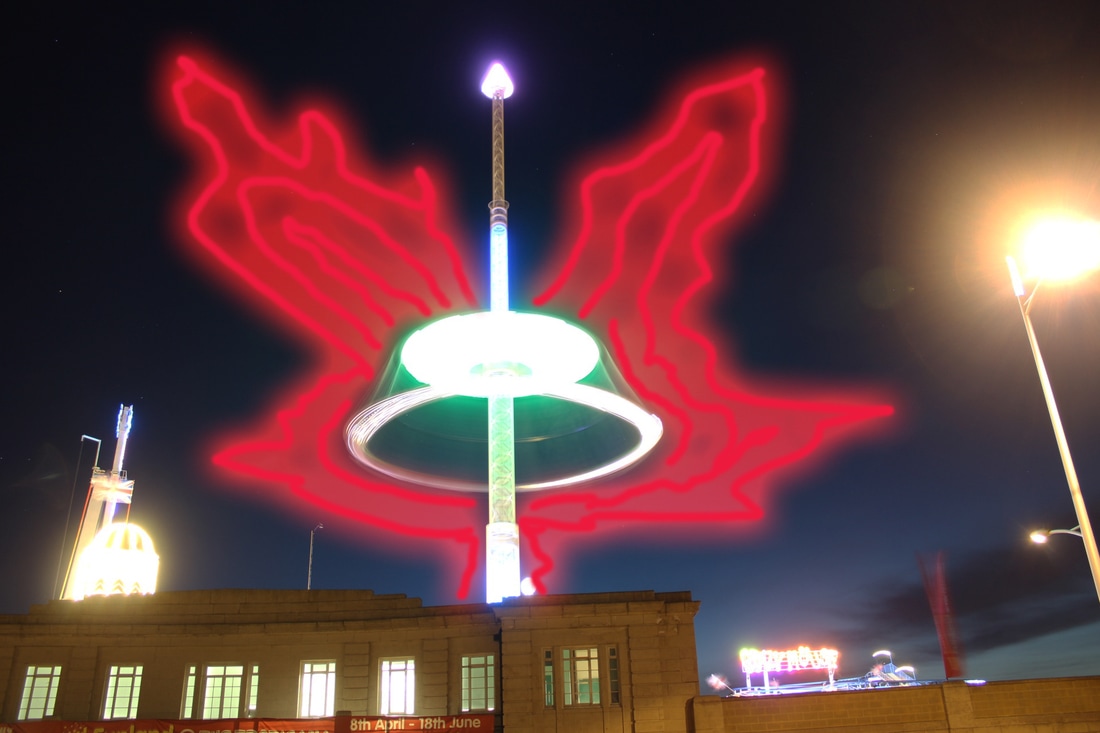
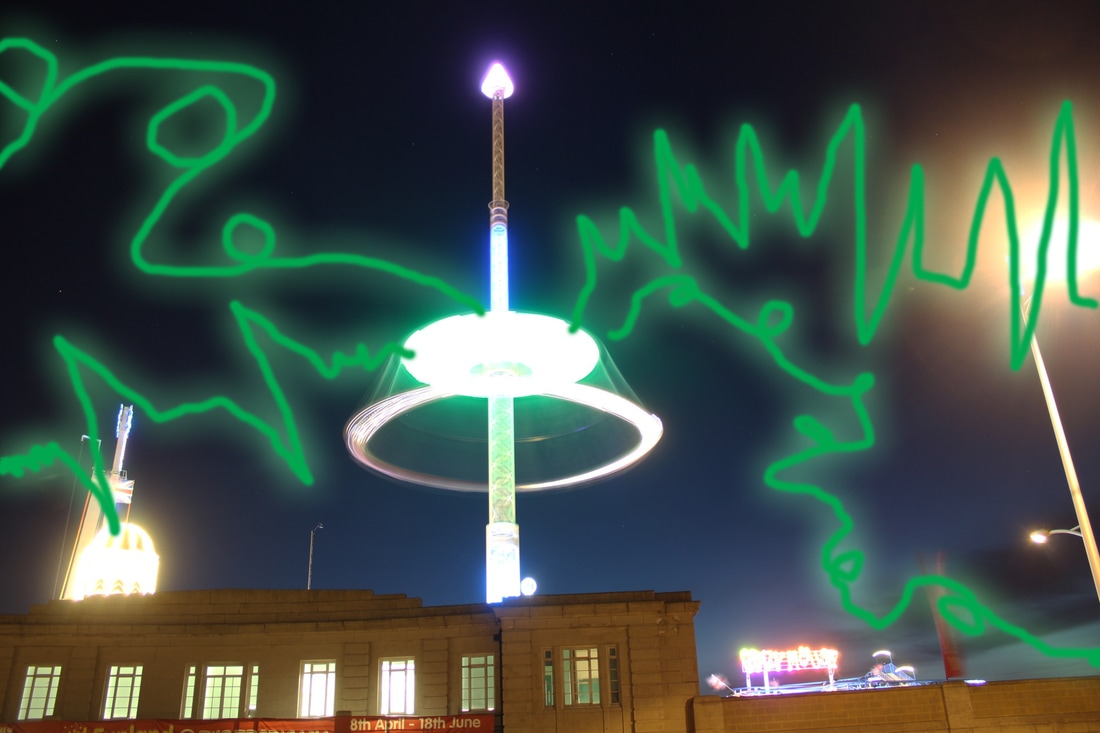
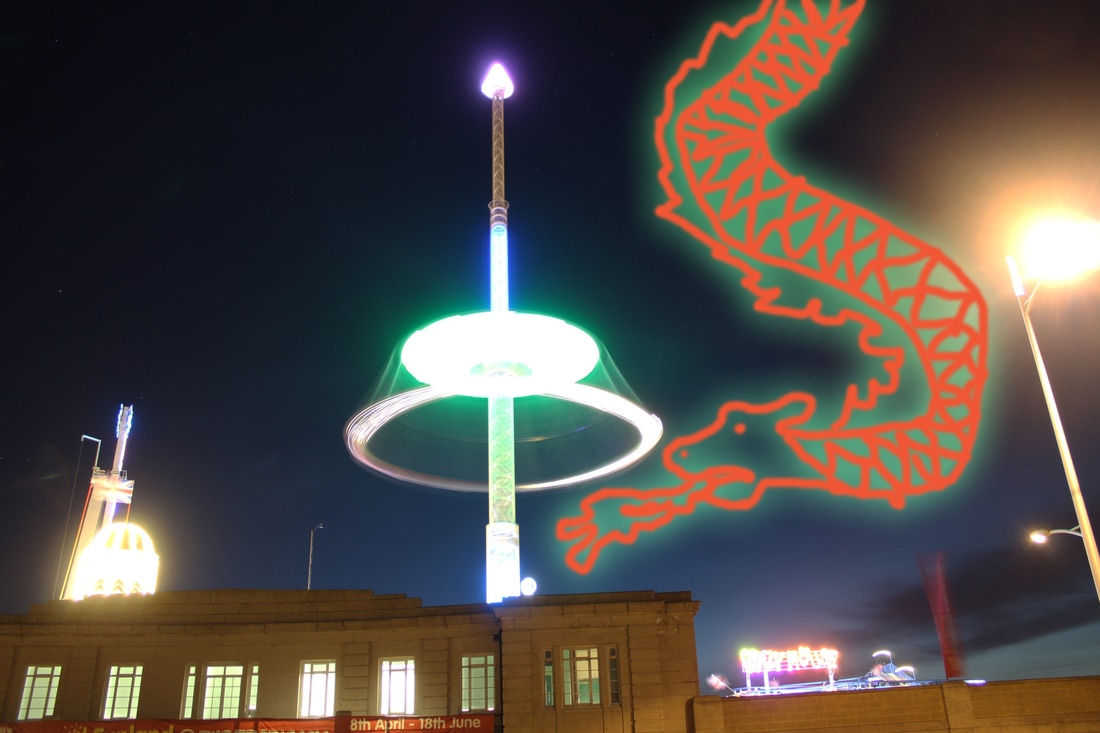
Shoot 9
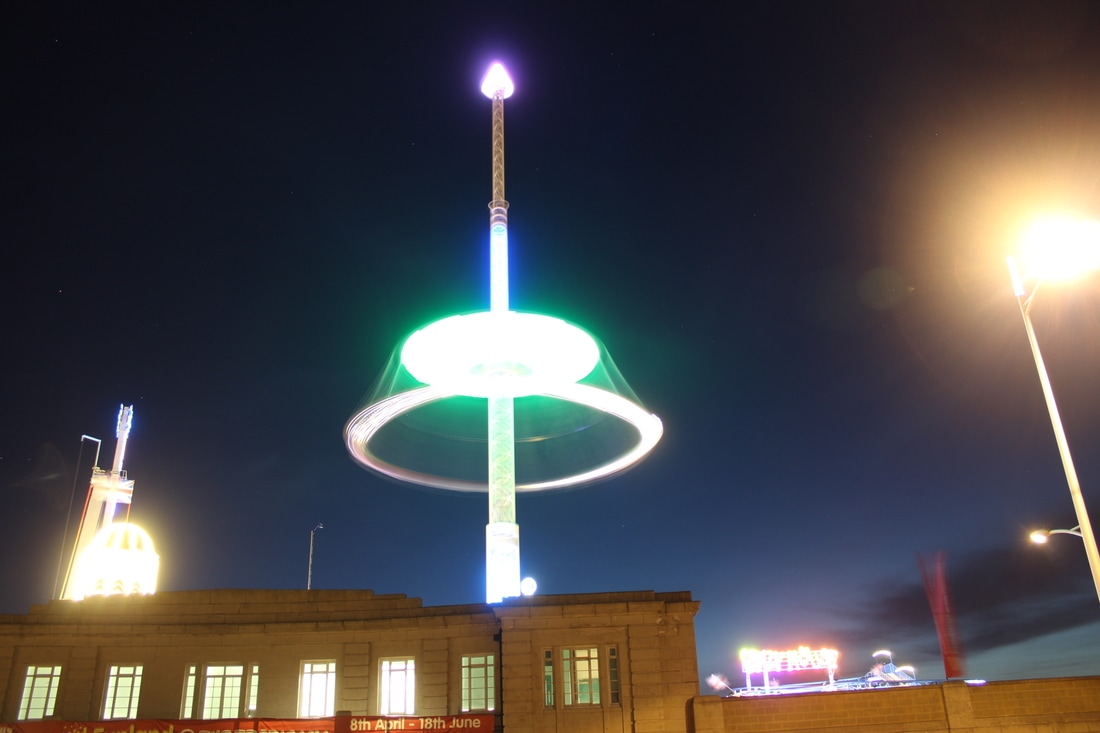
For this shoot I traveled to Weston at night, I visited the fair ground to take a few photos of their amusements that glow up with different lights. I mainly focused on this attraction that spins and moves up a tower displaying different colors. This was really enjoyable steering away to other places for light trails instead of going for cars. I think this shoot could be improved simply by adding variety.

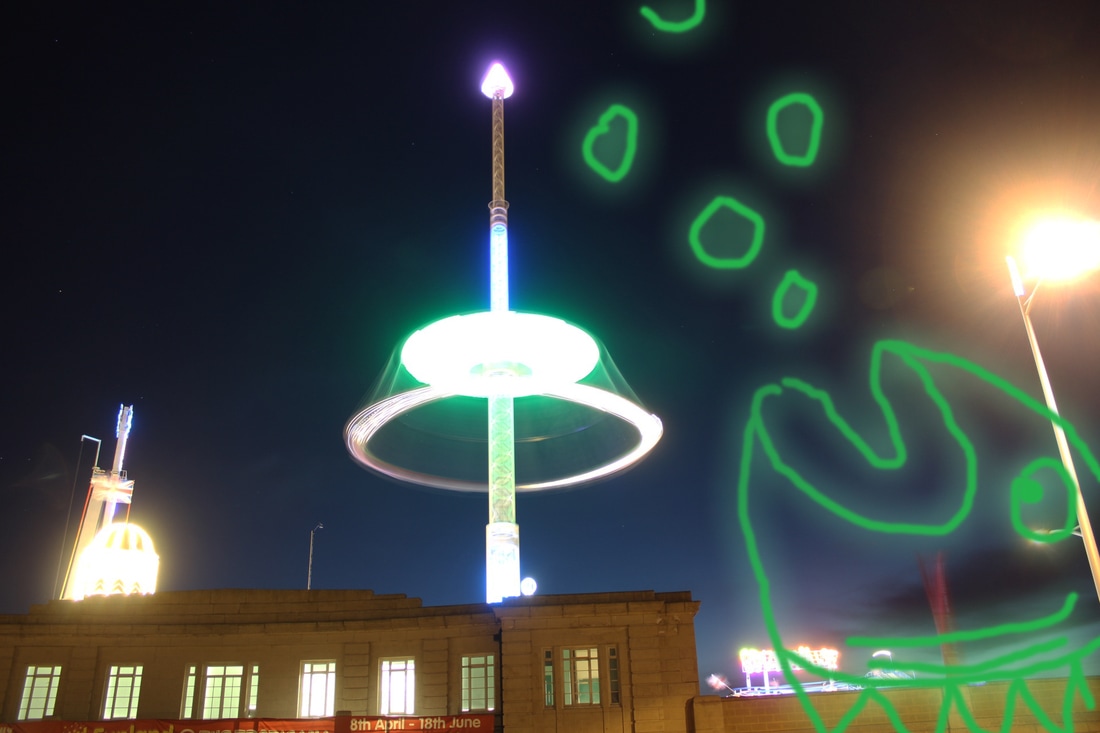
Practice with Photoshopped light trails
To create my Photoshop light trails I created a new layer, used a paint brush to draw and then went over to layer, layer style, outer glow. At this menu I matched the glows color to the color of the paint. here are some outcomes.
My Final Piece
Support Pieces

Evaluation
Why I Chose My Final Piece
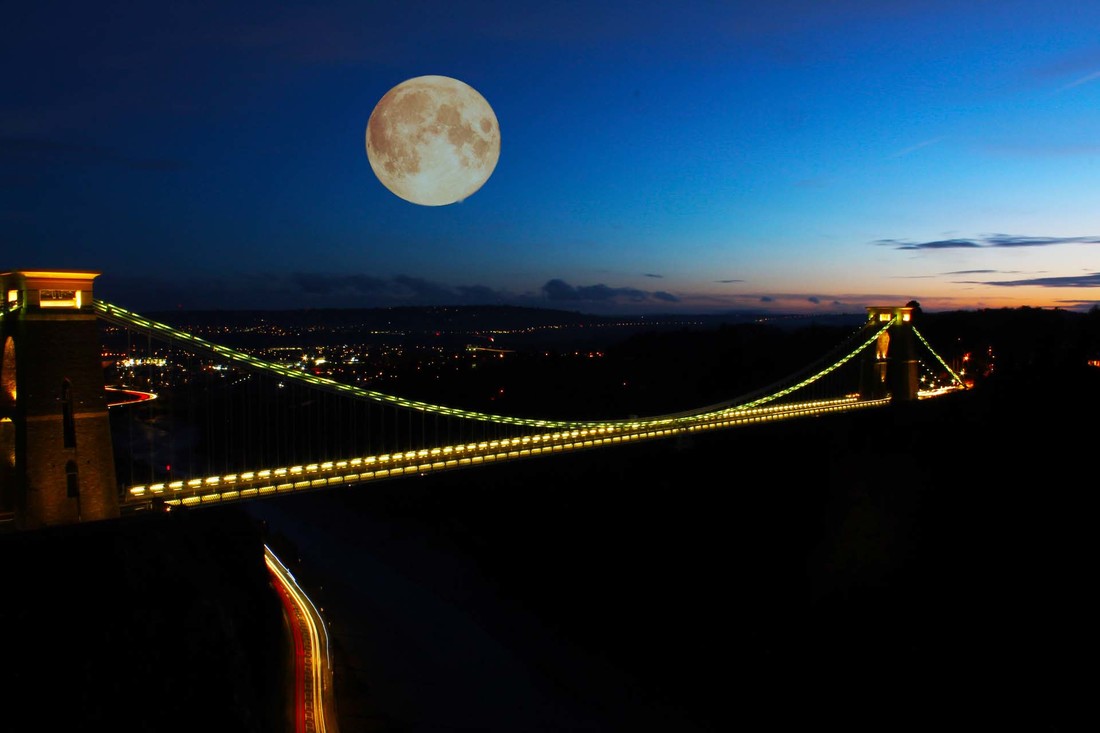
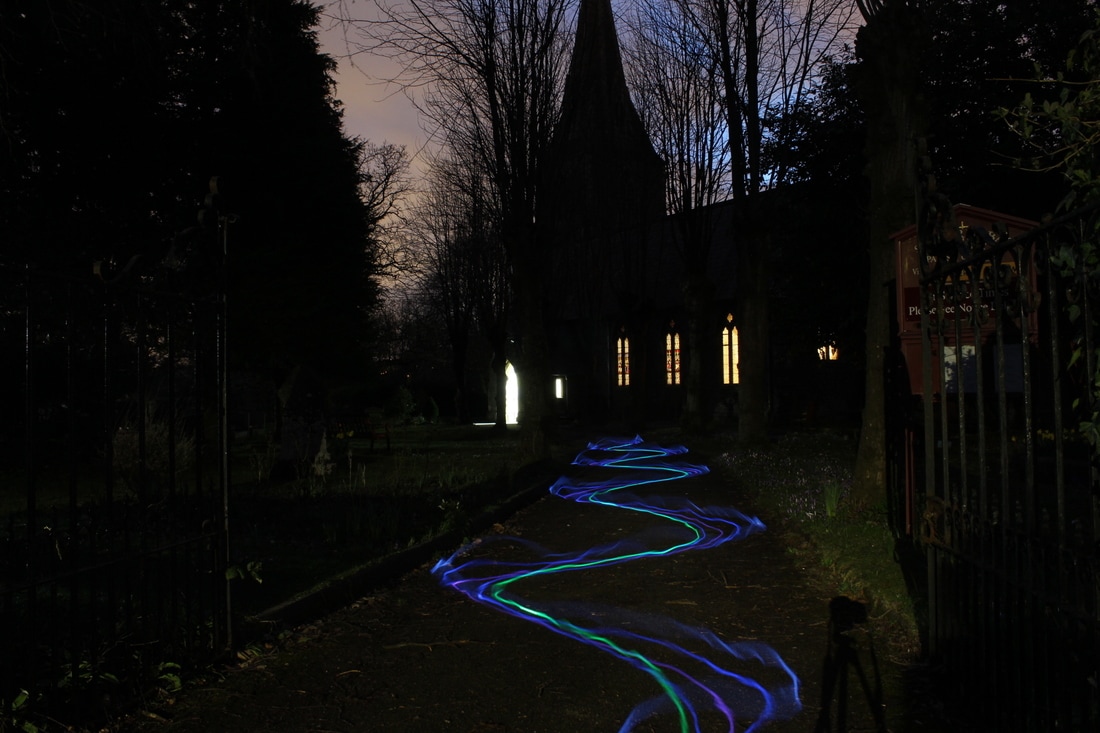
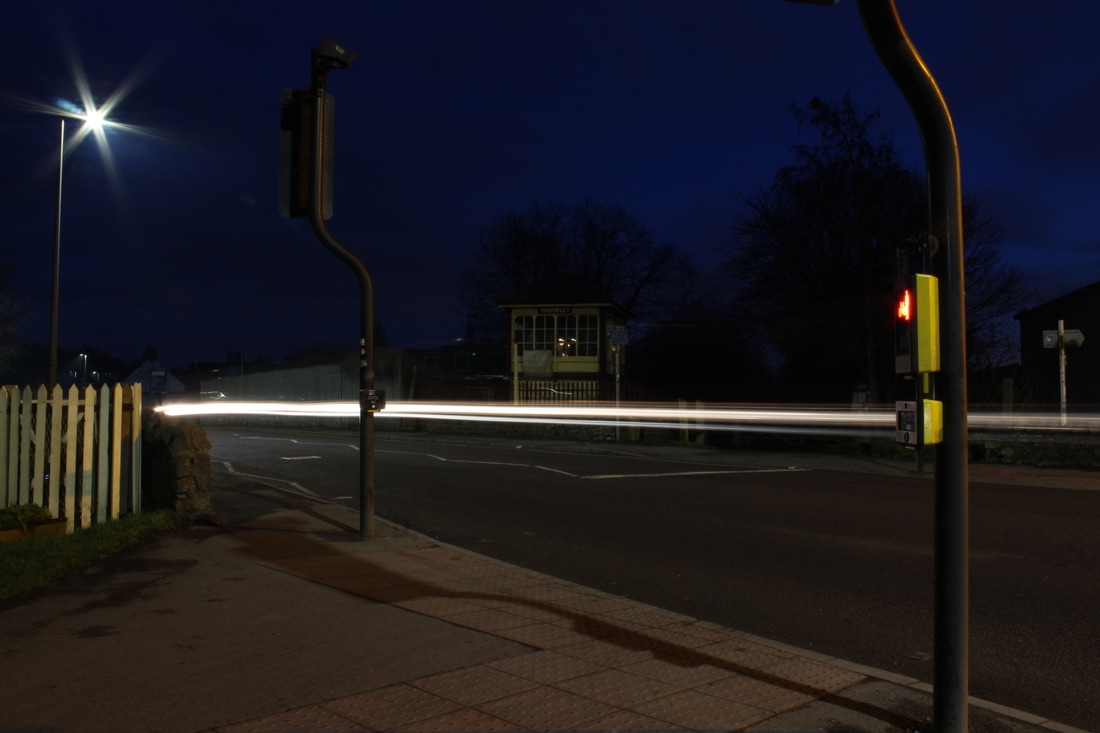
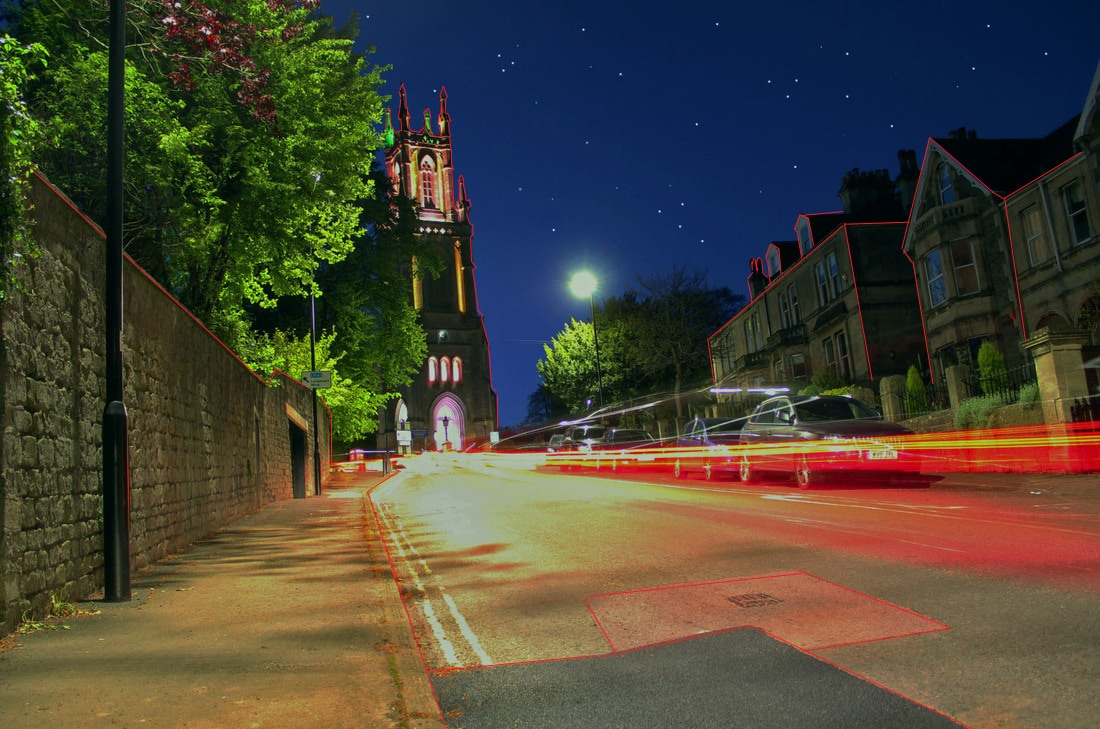
For my final piece I chose to make a book with my favorite images in. I decide on this product because it corresponds to the work I did where I photo-shopped a photo inside a book like David J Carol. This demonstrates how I have been influenced by my artist. Also I can demonstrate how I have developed through the different stages of my work. This book takes you through my first attempt at light trails at Clifton Suspension Bridge and trying different locations at the Suspension Bridge to maximize the amount of trail I can get. Then on to a later shoot where I attempted to use cars on the ring road to experiment with light. Then finally to my final piece of light trails going up to the church.
To take my final piece it was quite difficult because you can't get the whole church in the shot unless your in the road which is first and for most dangerous but you would stop cars so you can't get a light trail anyway. Also I had to balance the amount of ambient lighting with how long a streak of light I make. The worst things that create ambient light in this case is the street lights and the lights on the church that create glare. To combat these issues I used an 8 second exposure on a 400 ISO speed, which stops fuzziness when brightening the picture but doesn't give nasty pix-elation. Also I used a Hoya UV filter to minimize glare and amounts of unwanted light.
When in Photoshop I changed things like contrast and vibrance but I also used some photos of stars I have from a photo shoot I did at night and cut them out and stuck them in my final piece by using the lasso tool dragging the over on to a new layer and sponging them in. I did this to bring more interest to the shot without it looking too distracting and not looking super fake. Also I have to be careful of the headlights on cars because they can take away from the image if there too strong.
Ideas Behind My Final Piece and Presentation Ideas
As you can tell I didn't really stick to my sketches, well I took elements from all of them. I started by taking the book idea as photos are more enjoyable when their complemented by other photos and when their a physical copy and have some weight to them. Also it complements my work nicely where I've been looking at a piece created by David J Carol. Then I took the Idea of using a hill in my piece, I used a hill because of all the options it gives you to experiment with, you can experiment with location, the space in the sky, objects and places near the hill and viewpoint.
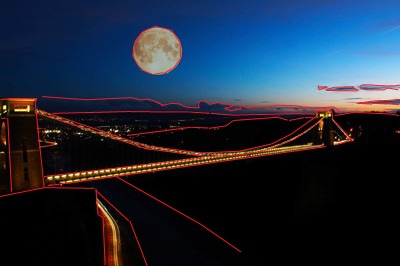
Then on to my final part of the equation, the sky/space in my sketch I wanted to use a photo of the moon I have or take a photo of the setting sun, I didn't use either in my final piece and here's why. Firstly it was already dark so the sun would probably not fit amazingly I want my photos to feel slightly futuristic but not out of place also it can feel a bit over the top and distracting which takes away from the true quality components. Leading on to the moon again it can be a nice touch but to some its just unnecessary and unneeded. So to keep space in mind but not make the work worse I used stars,m stars are interesting and are a more light and enjoyable touch to a photo instead of putting the sun or moon in which is quite over bearing.
Then on to my final part of the equation, the sky/space in my sketch I wanted to use a photo of the moon I have or take a photo of the setting sun, I didn't use either in my final piece and here's why. Firstly it was already dark so the sun would probably not fit amazingly I want my photos to feel slightly futuristic but not out of place also it can feel a bit over the top and distracting which takes away from the true quality components. Leading on to the moon again it can be a nice touch but to some its just unnecessary and unneeded. So to keep space in mind but not make the work worse I used stars,m stars are interesting and are a more light and enjoyable touch to a photo instead of putting the sun or moon in which is quite over bearing.
Why I Chose My Support Pieces
I chose my support pieces because they are simply my favorite pieces, they all have key components to become my favorite pieces like interesting geometry and interesting perspective. Also the colors really interest me, they all have reds, greens, oranges and blues which make for a nice level of contrast without being over bearing. below I have the images with lines on them showing where my favorite elements of geometry sit.

The Style Of My Final Piece
For my final piece I have followed a very certain style, I have decided to cut pieces out of my photos out to highlight the core geometry. I used a scalpel and carefully cut the pieces out, however I had to look out for burrs that occur when cutting paper. Also some geometric shapes I wanted to cut out I had a problem with when the had parts to them that where very delicate like where I cut out the sign on the photo of the ring road. Furthermore some pieces That I wanted to cut out where barely visible due to how they where printed like on the photo above of the Clifton suspension bridge below the bridge its extremely dark even after brightening the photo on Photoshop.
For the second part of my final piece I used my photo of the church and printed it on A3 paper. Then with a combination of sharp and blunt instruments I cut onto the paper. I started by only using the sharpest knife to carve very small details on to the piece so I could get a good Idea of where to go over. Then I repeated the process making sure all the areas I want where ready for the blunt tool. Then with the blunt tool I carved white lines by holding the Knife at about eighty degrees to the page, then I drew along the rulers edge. This technique drew nice white lines on the page. Then for refinement I decided to go over the trees, this task proved to be very difficult I begun by using the sharp knife cutting and chipping away at the page but it wasn't getting the right results I wanted. So I used the blunt knife this was very painful to use as I had to push really hard round very short turns which could become messy. So I actually gave up with knives and used the sharp end of a metal ruler to neatly carve away.
For the second part of my final piece I used my photo of the church and printed it on A3 paper. Then with a combination of sharp and blunt instruments I cut onto the paper. I started by only using the sharpest knife to carve very small details on to the piece so I could get a good Idea of where to go over. Then I repeated the process making sure all the areas I want where ready for the blunt tool. Then with the blunt tool I carved white lines by holding the Knife at about eighty degrees to the page, then I drew along the rulers edge. This technique drew nice white lines on the page. Then for refinement I decided to go over the trees, this task proved to be very difficult I begun by using the sharp knife cutting and chipping away at the page but it wasn't getting the right results I wanted. So I used the blunt knife this was very painful to use as I had to push really hard round very short turns which could become messy. So I actually gave up with knives and used the sharp end of a metal ruler to neatly carve away.
